Gipfeli recipe, the iconic Swiss pastry, is a simple yet delightful treat that has captured the hearts of many. Known for its buttery, flaky texture and perfect balance of sweetness, Gipfeli is often enjoyed with a hot cup of coffee or tea. Whether you’re making it for breakfast or as a sweet snack, this pastry’s soft layers and rich flavor will transport you straight to the heart of Switzerland. In this recipe, we’ll guide you through the steps to make your own Gipfeli from scratch—so you can enjoy this traditional Swiss delicacy right at home.
Essential Ingredients for Perfect Gipfeli
Flour and Yeast
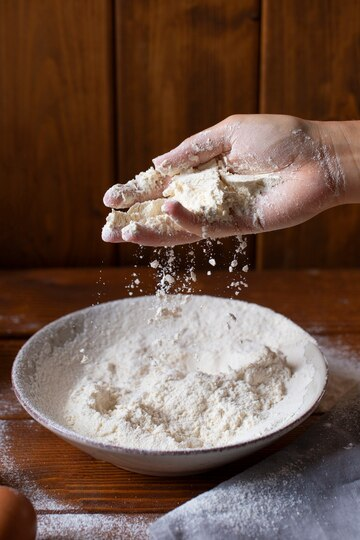
Gipfeli, the Swiss cousin of the French croissant, relies on high-quality flour and properly activated yeast to achieve its signature flaky, buttery layers. Understanding how these ingredients work together is key to making Gipfeli that are light, airy, and delicately crisp on the outside.
Gipfeli Recipe
Choosing the Right Flour
Flour is the backbone of Gipfeli dough, determining its texture and structure. Since Gipfeli require a dough that is strong enough to hold layers of butter but still soft and tender, the choice of flour is crucial.
- All-Purpose Flour: This is a reliable option that provides a balanced structure, yielding a slightly softer but still flaky Gipfeli.
- Bread Flour: With a higher protein content (12-14%), bread flour develops more gluten, which enhances the dough’s elasticity. This results in a chewier texture and stronger layers—ideal if you prefer a more structured Gipfeli.
- Pastry Flour: A lower-protein option that produces a more delicate, tender crumb. However, it may not develop enough gluten for proper lamination, so it’s best mixed with all-purpose flour.
For the best results, many bakers use a combination of bread flour and all-purpose flour to balance elasticity and tenderness, ensuring beautifully layered Gipfeli.
The Role of Yeast in Gipfeli Dough
Yeast is essential in giving Gipfeli their airy texture. The fermentation process creates air pockets, which expand during baking to create light, fluffy layers. The two main types of yeast used in Gipfeli dough are:
- Active Dry Yeast: Requires proofing in lukewarm liquid (milk or water at 100-110°F) before being added to the dough. This ensures the yeast is fully activated and ready to ferment the dough.
- Instant Yeast (Rapid Rise Yeast): Can be added directly to the flour without proofing. It activates more quickly and helps the dough rise faster, making it a convenient choice for home bakers.
Pro Tip: If using fresh yeast (also called cake yeast), dissolve it in warm milk before adding it to the flour to ensure even distribution.
Getting the Perfect Dough Consistency
- Hydration Matters: The right balance of liquid (milk or water) ensures the dough is pliable but not too sticky. If the dough is too dry, it won’t roll out smoothly; if too wet, it may become too soft and difficult to laminate.
- Kneading for Structure: Kneading activates the gluten, making the dough more elastic and capable of forming strong, flaky layers. Knead until the dough is smooth and slightly elastic.
- Cold Fermentation for Better Flavor: Allowing the dough to rest in the refrigerator overnight slows down yeast activity, leading to better flavor development and improved texture.
En choisissant la bonne farine et en utilisant correctement la levure, vous créerez des Gipfeli légers, feuilletés et pleins de beurre, tout comme ceux d’une boulangerie suisse !
Butter: The Key to Buttery, Flaky Gipfeli
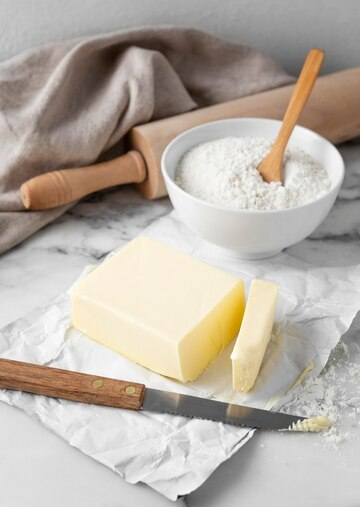
Butter is the star ingredient in Gipfeli, responsible for its signature flaky layers, rich flavor, and melt-in-your-mouth texture. Choosing the right butter, handling it properly, and incorporating it correctly into the dough are essential for achieving bakery-quality results.
Gipfeli Recipe
Choosing the Right Butter
The type and quality of butter you use can make a huge difference in the final texture and taste of your Gipfeli. Here’s what to consider:
- High-Fat Butter (European-Style Butter): Contains at least 82% butterfat, which means less water and more fat. This results in a richer taste and better layering during the lamination process. Brands like Plugrá, Kerrygold, or Lurpak are excellent choices.
- Regular Butter (Standard Supermarket Butter): Contains about 80% butterfat, with more water content. While it can still be used, the layers may not be as defined, and the flavor may be slightly less rich.
- Unsalted vs. Salted Butter: Unsalted butter is the preferred choice because it allows you to control the salt content in your dough. Salted butter can alter the taste and consistency of the dough.
Butter Temperature and Handling
Butter temperature is crucial in Gipfeli-making because it affects the lamination process, which creates the delicate layers. Here’s how to handle it properly:
- For Laminating: The butter must be cold but pliable—firm enough to hold its shape but soft enough to roll out without cracking. If the butter is too hard, it will break into chunks and ruin the layering; if too soft, it will seep into the dough rather than creating distinct layers.
- Butter Block Method: Many professional bakers shape their butter into a thin, even rectangle before incorporating it into the dough. This helps create even layers when rolling and folding the dough.
- Réfrigération entre les plis : Chaque fois que vous étalez et pliez la pâte, il est important de la refroidir au réfrigérateur pendant au moins 30 minutes. Cela empêche le beurre de fondre et maintient le feuilletage du Tipfeli final.
Gipfeli Recipe
How Butter Creates Flaky Layers
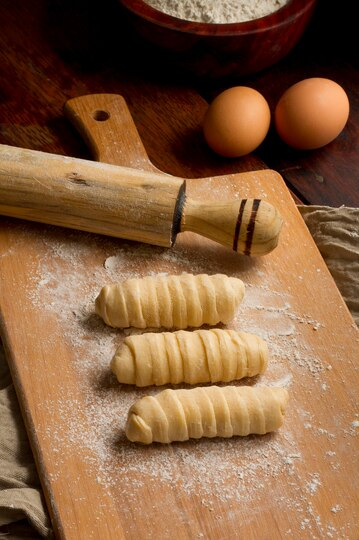
The lamination process—where butter is folded into the dough multiple times—creates ultra-thin layers of dough separated by butter. When baked, the water in the butter turns to steam, pushing the layers apart and creating that signature light, airy texture.
To ensure a perfect lamination process:
- Enclose the Butter Properly: The butter should be fully encased in dough before rolling and folding.
- Use Gentle Pressure When Rolling: Avoid pressing too hard, as this can squeeze the butter out of the layers.
- Keep Everything Cold: If at any point the dough becomes too soft or the butter starts leaking, refrigerate it immediately before continuing.
Common Butter Mistakes and How to Fix Them
- Butter Leaking During Baking: This could be due to overhandling the dough, butter being too warm, or uneven layering. Always chill the dough between folds and ensure the butter is evenly distributed.
- Dough Tearing When Rolling: This may happen if the butter is too hard and cracks when rolling. Let it sit at room temperature for a few minutes before rolling to soften slightly.
- Gipfeli Not Flaky Enough: This can result from using butter with a lower fat content, rolling the dough too aggressively, or not chilling it enough between folds.
En sélectionnant du beurre de haute qualité, en le manipulant avec soin et en maîtrisant le processus de laminage, vous obtiendrez des Gipfeli magnifiquement feuilletés et beurrés qui rivalisent avec ceux d’une boulangerie suisse !
Gipfeli Recipe
Step-by-Step Guide to Making Gipfeli
Making the Dough: The Foundation of Perfect Gipfeli
La création du Gipfeli parfait commence par une pâte bien équilibrée, lisse, élastique et facile à plastifier avec du beurre. La pâte doit être suffisamment molle pour lever correctement, mais suffisamment forte pour retenir ses couches feuilletées. Vous trouverez ci-dessous un guide étape par étape pour préparer la pâte Gipfeli de la bonne façon.
1. Choosing the Right Ingredients
The dough for Gipfeli is a yeast-leavened pastry dough, similar to croissant dough but slightly less rich. Here’s what you’ll need:
- Flour: A mix of all-purpose and bread flour works best to balance tenderness and structure.
- Yeast: Active dry or instant yeast ensures proper fermentation and light texture.
- Milk: Adds richness and helps with browning during baking.
- Sugar: Provides a touch of sweetness and helps with yeast activation.
- Salt: Enhances flavor and strengthens gluten development.
- Butter: While butter is primarily used for lamination, a small amount in the dough adds flavor and softness.
- Egg (Optional): Some recipes include an egg for extra richness and softness.
Gipfeli Recipe
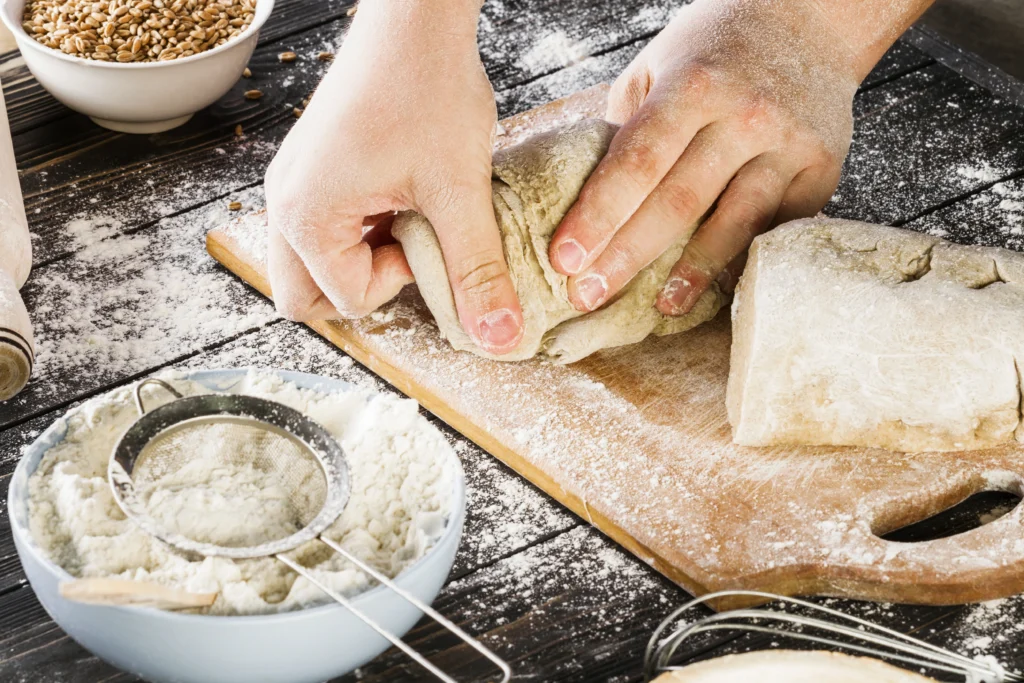
2. Mixing the Dough
- Activate the Yeast (if using active dry yeast):
- Warm the milk to about 100-110°F (38-43°C)—not too hot, or it will kill the yeast.
- Add the yeast and a teaspoon of sugar, stir, and let it sit for 5-10 minutes until it becomes frothy.
- Combine the Dry Ingredients:
- In a large mixing bowl, whisk together the flour, remaining sugar, and salt.
- Mix the Dough:
- Add the yeast mixture (or instant yeast), melted butter, and optionally, a lightly beaten egg.
- Mix until a rough dough forms.
- Knead the Dough:
- Knead the dough on a floured surface for about 8-10 minutes (or 5 minutes in a stand mixer with a dough hook).
- The dough should be smooth, elastic, and slightly tacky but not sticky.
3. First Proofing (Bulk Fermentation)
- Place the dough in a lightly greased bowl, cover it with plastic wrap or a kitchen towel, and let it rise at room temperature for 1.5 to 2 hours, or until doubled in size.
- For better flavor and structure, you can cold-proof the dough in the refrigerator overnight. This slow fermentation enhances the taste and makes rolling easier.
4. Preparing for Lamination
Once the dough has risen, it needs to be shaped and chilled before incorporating the butter for lamination:
- Punch down the dough to remove excess air.
- Shape it into a rectangle, wrap it in plastic wrap, and refrigerate for at least 1 hour before laminating with butter.
At this point, your dough is ready for the butter lamination process, where the layers of butter are incorporated to create Gipfeli’s classic flaky texture.
Gipfeli Recipe
Folding the Dough: Creating Flaky Layers
Folding the dough, also known as lamination, is the most crucial step in making Gipfeli. This process involves rolling out the dough, wrapping a layer of butter, and folding it a few times to create delicate, flaky layers. When cooked properly, the butter melts as it cooks, creating air pockets that give Gipfeli its characteristic crispness and lightness.
1. Preparing the Butter Block
Before folding the dough, you need to prepare the butter for lamination:
- Choose the Right Butter: Use high-fat, European-style butter (at least 82% butterfat) for the best results.
- Shape the Butter:
- Place the butter between two sheets of parchment paper.
- Roll it into a thin, even rectangle (about 6×8 inches / 15×20 cm).
- Refrigerate for 20-30 minutes to firm up but keep it pliable.
2. Enfermer le beurre (pli en lettre)
- Roll Out the Dough:
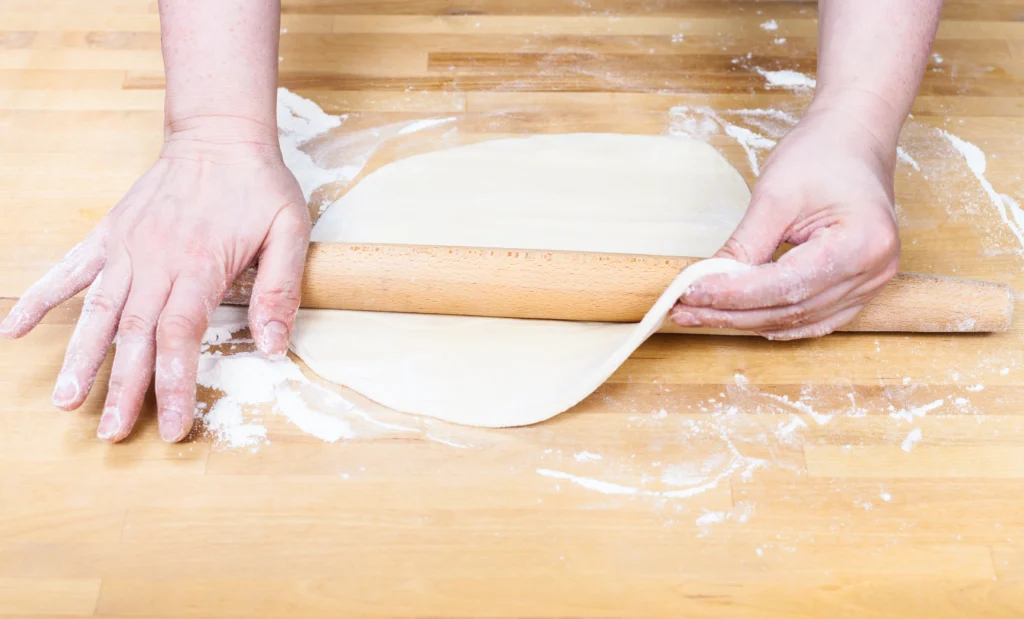
- Take the chilled dough and roll it into a 12×8 inch (30×20 cm) rectangle on a lightly floured surface.
- Keep the dough’s edges straight and even for uniform layers.
- Place the Butter Block:
- Position the butter in the center of the dough.
- Fold the dough over the butter from both sides, sealing the edges completely to prevent butter from leaking.
- Chill the Dough:
- Wrap the dough in plastic wrap and refrigerate for 30 minutes before rolling it out further.
3. First Fold (Single Fold)
- Roll the dough into a long rectangle (about 20 inches / 50 cm long).
- Fold it like a letter:
- Pliez le tiers inférieur de la pâte vers le haut.
- Fold the top third down over it, forming three layers.
- Turn the dough 90 degrees so the folds face you.
- Wrap and chill for 30 minutes before repeating.
4. Second and third bend (creating more layers)
- Repeat the rolling and folding two more times to create multiple layers.
- Always chill the dough between folds to keep the butter from melting.
After three folds, the dough will have 27 layers of butter and dough, resulting in an ultra-flaky Tiffeli.
5. Final Resting Before Shaping
Once all folds are completed:
Refrigerate the dough for at least 1 hour (or overnight for deeper flavor).
This final rest relaxes the gluten, making the dough easier to shape and preventing shrinkage.
Resting and Rising: The Secret to Light and Flaky Gipfeli
Resting and rising are essential steps in Gipfeli-making, allowing the dough to relax, develop flavor, and create the perfect airy, flaky texture. Rushing this process can lead to tough, dense pastries, so patience is key.
1. Resting the Dough Between Steps
Throughout the Gipfeli-making process, resting periods are crucial to maintaining the dough’s structure and preventing overworking.
After Mixing the Dough (Bulk Fermentation)
- Once the dough is kneaded, it needs to rise for 1.5 to 2 hours at room temperature.
- Cover the bowl with plastic wrap or a clean kitchen towel to prevent it from drying out.
- The dough should double in size. If your kitchen is cold, it may take longer (you can place it in a slightly warm oven for a gentle rise).
💡 Optional cold fermentation :
For best flavor and texture, refrigerate the dough overnight (8 to 12 hours). This slow fermentation improves the taste and makes rolling easier.
Between Laminating Steps
- After each fold, the dough must rest in the refrigerator for at least 30 minutes before rolling it out again.
- This allows the gluten to relax and prevents the butter from melting into the dough.
- If the dough feels too soft or sticky at any point, chill it for an additional 15-20 minutes before continuing.
2. Final Proofing Before Baking
Once the Gipfeli are shaped, they need a final rise before baking to achieve their soft, airy texture.
Final Rise (Second Proofing)
- Place the shaped Gipfeli on a baking sheet lined with parchment paper.
- Cover loosely with plastic wrap or a towel.
- Let them rise at room temperature (75-80°F / 24-27°C) for 1.5 to 2 hours, or until they appear puffy and nearly doubled in size.
- Avoid overproofing, as this can cause the layers to collapse during baking.
💡 Astutenes : If your kitchen is cold, create a warm environment by placing the sheet in the oven with the light on or a bowl of warm water nearby.
3. Refrigerate before cooking (optional but recommended)
After rising, refrigerate the shaped Gipfeli for 15 to 20 minutes before baking. This helps to firm up the layers of butter, resulting in more defined flakes and crispier results.
Final Checks Before Baking
The Gipfeli should look puffy but still hold their shape.
When gently pressed, the dough should slowly spring back. If it deflates, it has overproofed.
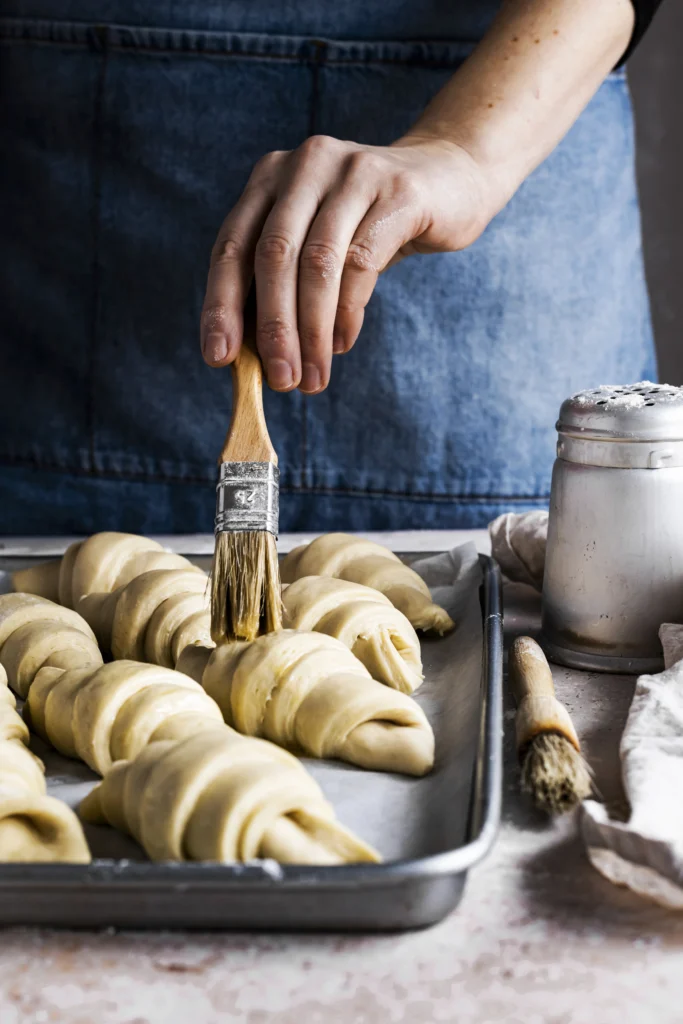
Brush with egg wash (1 egg + 1 tbsp milk or cream) for a golden-brown finish.
Shaping the Gipfeli: making the perfect croissant
Once your dough has been properly rolled, rested and cooled, it’s time to shape the Gipfeli. This step is crucial to achieve their characteristic crescent shape and ensure even cooking. Good shape also helps to maintain the delicate layers you’ve worked hard for.
Gipfeli Recipe
1. Rolling Out the Dough
- Lightly flour your work surface to prevent sticking.
- Take the chilled dough out of the refrigerator and let it sit for 5 minutes to make rolling easier.
- Using a rolling pin, roll the dough into a large rectangle (about 20×10 inches / 50×25 cm), keeping the thickness even—around 1/4 inch (6 mm) thick.
💡 Tip: If the dough resists rolling or shrinks, let it rest for a few minutes to loosen the gluten..
2. Cutting the Triangles
- Use a sharp knife or a pizza cutter to trim the edges of the dough for clean lines.
- Cut the dough into long, evenly sized triangles. Each triangle should be about 4 inches (10 cm) wide at the base and 8 inches (20 cm) long.
- For consistency, you can use a ruler to measure or cut a paper template as a guide.
💡 Tip: If you prefer a smaller Gipfeli, adjust the size of the triangle accordingly.
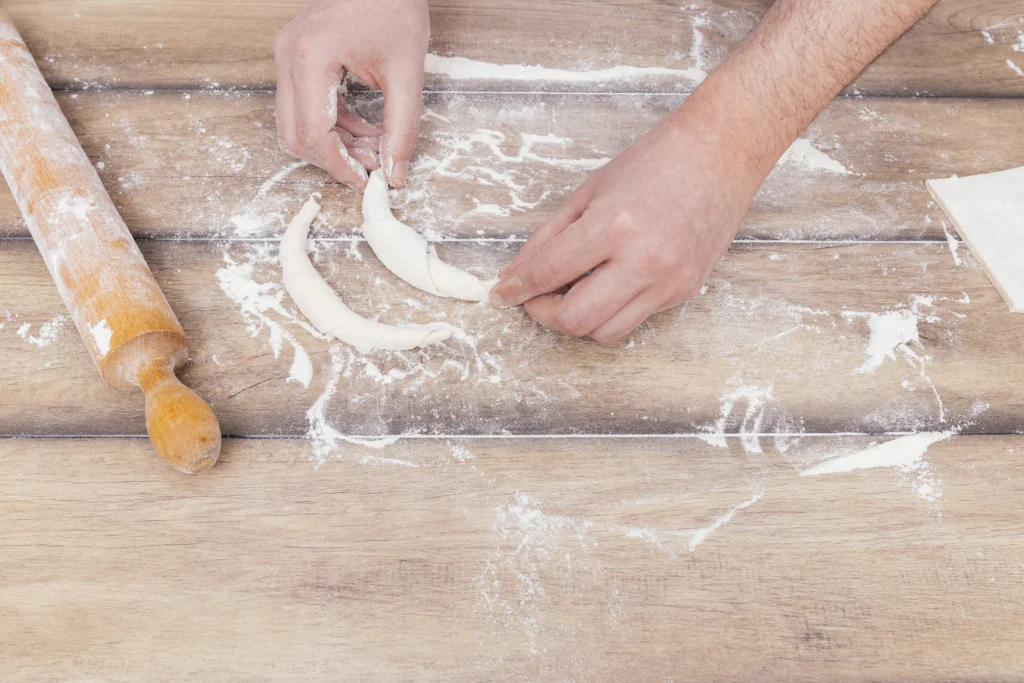
3. Rolling the Gipfeli
- Take one dough triangle and gently stretch it slightly to lengthen it.
- Start rolling from the wide base toward the pointed tip.
- Keep the roll firm but not too tight—this allows room for expansion during baking.
- Once rolled, curve the ends slightly to create the classic crescent shape.
💡 Pro Tip: Place the rolled Gipfeli with the tip tucked underneath to prevent them from unrolling during baking.
Gipfeli Recipe
4. Final Proofing Before Baking
- Arrange the shaped Gipfeli on a parchment-lined baking sheet, leaving enough space between them to expand.
- Cover lightly with plastic wrap or a clean towel.
- Let them proof for 1.5 to 2 hours at room temperature, or until they look puffy and nearly doubled in size.
💡 Optional: For even better layering and a crispier texture, chill the proofed Gipfeli in the refrigerator for 15-20 minutes before baking.
Baking Tips for the Flakiest Croissants
Perfect Oven Temperature: The Key to Golden, Flaky Gipfeli
Cooking the Gipfeli to the right temperature is crucial to achieving a crispy, flaky exterior while keeping the inside soft and airy. The heat in the oven should be high enough to create steam, which helps the layers rise and separate, but not so high that the pastries burn before they’re fully baked.
1. The Ideal Temperature for Gipfeli
- The best oven temperature for baking Gipfeli is 375-400°F (190-200°C).
- A slightly higher temperature (400°F/200°C) gives a more pronounced golden crust, while a slightly lower temperature (375°F/190°C) allows for more even baking.
- Convection ovens: If using a convection (fan-assisted) oven, lower the temperature by about 25°F (15°C) since convection circulates hot air more efficiently.
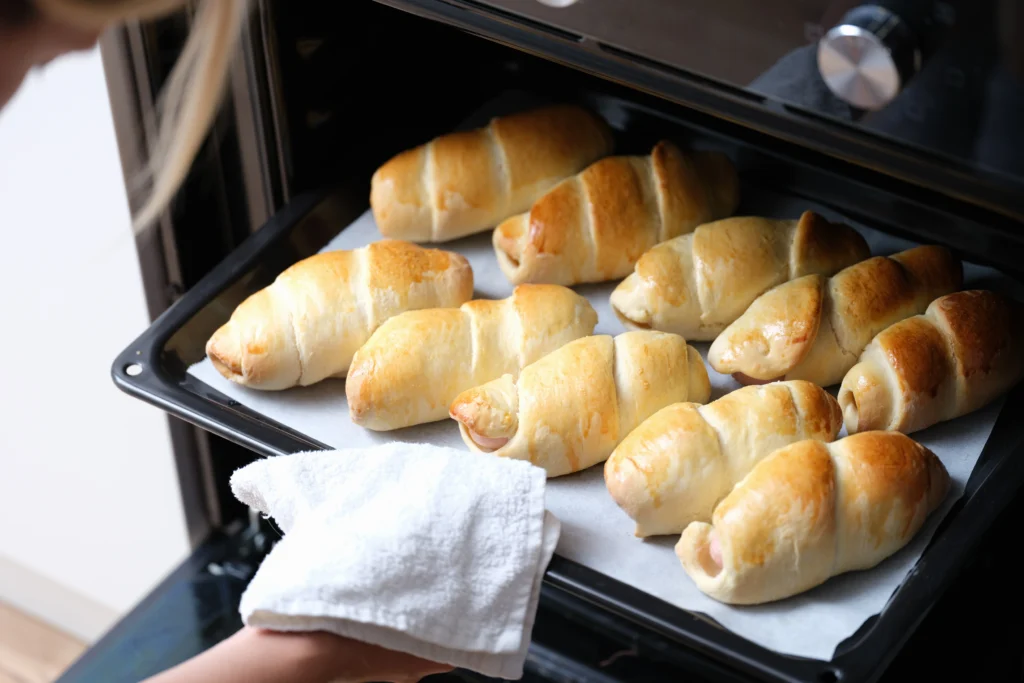
Gipfeli Recipe
2. Preheating the Oven Properly
- Always preheat the oven for at least 15-20 minutes before baking to ensure consistent heat.
- A properly preheated oven helps the butter layers create steam instantly, leading to perfect flakiness.
- Using an oven thermometer is a great way to ensure accuracy, as home ovens can often be off by 10-20 degrees.
💡 Tip: If your oven tends to have hot spots, rotate the baking sheet halfway through baking for even browning.
3. Creating the Right Baking Environment
- Steam for a Crispier Crust:
- Adding moisture to the oven helps Gipfeli rise beautifully.
- You can place a small oven-safe pan with hot water on the lower rack or lightly spray the oven with water before baking.
- Avoid Opening the Oven Door Too Soon:
- Opening the oven too early can cause the heat to escape, preventing proper rising and crisping.
- Wait until at least halfway through the baking time before checking.
4. Baking Time and Checking for Doneness
- Gipfeli typically bake for 18-22 minutes at 375-400°F (190-200°C).
- They should be golden brown all over, with visible flaky layers and a crisp texture.
- To check for doneness, tap the bottom of a Gipfeli—if it sounds hollow, they are fully baked.
💡 Tip: If the top browns too quickly but the inside is not fully cooked, cover them lightly with foil and continue cooking.
5. Cooling for the Best Texture
- After baking, transfer Gipfeli to a wire rack immediately to prevent them from getting soggy.
- Let them cool for at least 10-15 minutes before serving. This allows the layers to set properly.
By maintaining the perfect oven temperature and creating the right baking environment, you’ll achieve bakery-quality Gipfeli with a beautifully crisp, golden crust and a light, airy interior!
How to Get the Best Puff: Achieving Light, Flaky Gipfeli
A perfect Gipfeli should have a beautifully puffed, flaky texture with distinct layers. Achieving the best rise (or “puff”) comes down to proper technique, temperature control, and handling the dough correctly. Here’s how to maximize your Gipfeli’s puffiness.

Gipfeli Recipe
1. Use High-Quality Butter for Better Layers
- The butter content in Gipfeli is responsible for creating the flaky layers. Use high-fat, European-style butter (82% or higher butterfat) for the best results.
- The butter should be pliable but cool when laminating—too soft, and it will blend into the dough instead of forming layers.
💡 Tip: If your butter starts melting while folding, chill the dough immediately to keep the layers intact.
2. Maintain the Right Dough Temperature
- Keep everything cold! A warm dough will absorb butter, leading to a dense, greasy texture instead of a light, puffy pastry.
- Chill the dough between every fold (at least 30 minutes) and before shaping for the best layering effect.
- If your kitchen is warm, refrigerate your rolling pin and even freeze your flour briefly before working with the dough.
3. Roll and Fold with Precision
- When rolling out the dough, apply even pressure to maintain uniform thickness.
- Avoid overworking the dough—too much rolling can compress the layers, reducing puffiness.
- Stick to the three-fold lamination process (folding in thirds) to create the ideal number of layers.
💡 Tip: If you see butter dripping, sprinkle a little flour on it and cool the dough before continuing.
4. Proofing for the Perfect Rise
- Let the shaped Gipfeli rise at room temperature for 1.5 to 2 hours until they look noticeably puffy.
- Don’t overproof! If they become too soft or collapse when touched, they may deflate in the oven.
- A well-proofed Gipfeli should slowly spring back when lightly pressed.
💡 Bonus Tip: After proofing, chill the pastries in the fridge for 15-20 minutes before baking. This helps keep the layers defined during baking.
5. Bake at the Right Temperature for Maximum Puff
- High heat is key! Bake at 375-400°F (190-200°C) to create an instant burst of steam, which lifts the layers.
- A fully preheated oven ensures that the butter in the dough evaporates at the right time, creating a beautifully puffed structure.
- If using a convection oven, lower the temperature by 25°F (15°C) to prevent overbrowning.
💡 Trick: Placing a small pan of hot water in the oven during baking helps create steam, boosting the puff.
6. Let the Gipfeli Cool Properly
Avoid eating them immediately! Cooling on a wire rack for at least 10-15 minutes allows the layers to set.
This prevents the dough from getting soggy and helps maintain its crispy, flaky texture.

Gipfeli Recipe
SKnow when they’re done
Achieving the perfect gipfeli requires precision, as underbaking or overbaking can affect both the texture and flavor. Here’s how to know when your gipfeli are perfectly done:
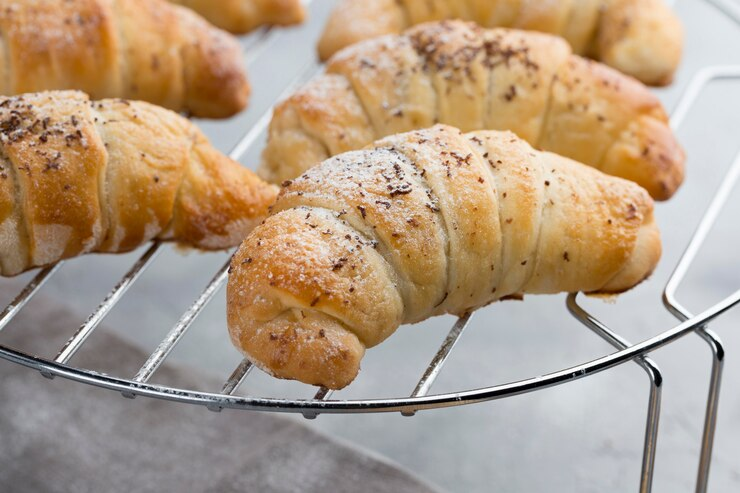
- Golden-Brown Exterior: The first sign that your gipfeli are ready is a golden-brown color on the outside. The buttery, flaky layers should have developed a beautiful hue, but be careful not to let them become too dark or burnt. The croissants should be a deep golden shade, but still have a slight sheen from the butter.
- Flaky Texture: A key characteristic of gipfeli is their flaky, light texture. When you tap the side or bottom of one, it should sound hollow. This indicates that the layers have risen and created the airy pockets inside, a sign of a properly baked gipfeli.
- Even Rise: The dough should rise evenly during baking, with the crescent shape being well-defined and slightly puffed. If the gipfeli are uneven or still look doughy, they likely need a bit more time in the oven.
- Visual Cracking: As they bake, the dough layers may develop small cracks. This is a great sign that the dough has properly expanded, and the interior is now light and airy. If you notice cracks but the color is golden, you can be confident they’re nearing the perfect doneness.
- Touch Test: After baking, gently touch the top of a gipfeli. It should feel firm to the touch without being soft or doughy. If it’s soft and sinks in when pressed, it might need more time. However, if it’s hard or overly crisp, you’ve likely overbaked them.
- Bake Time Variations: Depending on your oven and the size of your gipfeli, baking times may vary. It’s essential to stay within the suggested range (typically around 12-15 minutes), but it’s always a good idea to check the appearance of your gipfeli during the last few minutes of baking. They may rise quickly, but you want them to bake long enough to set the layers and develop the perfect flakiness.
- Resting Time: Once they come out of the oven, let the gipfeli rest on a cooling rack for a few minutes. This will allow the buttery layers to set and prevent them from becoming soggy as they cool. A too-early move can cause the layers to collapse, so patience is key!
By carefully monitoring these factors, you’ll ensure that your gipfeli are perfectly cooked, light, flaky, and golden brown with just the right amount of crispiness.
Enjoying Your Homemade Gipfeli: Serving Suggestions
Classic Swiss Breakfast
A traditional Swiss breakfast is simple, wholesome, and balanced, often featuring a combination of fresh bread, dairy products, and local delicacies. It’s a morning meal that reflects Switzerland’s emphasis on high-quality ingredients and natural flavors. Here’s a closer look at the elements that make up a classic Swiss breakfast:
Regional specialties: Although the components listed above are typical of many Swiss breakfasts, some regions have their own specialties. For example, in the French-speaking regions of Switzerland, you can find croissants or other French pastries as part of the morning meal. In the Alpine regions, hearty dishes like Alpermagronen (a type of pasta with cheese and potatoes) can even end up on the breakfast table in the colder months.
Fresh Bread: Swiss breakfasts typically start with freshly baked bread, often in the form of rolls (like Brötli) or hearty loaves such as rye or multigrain bread. Many Swiss people enjoy their bread with butter, jam, or honey. The bread is often still warm from the bakery and provides a comforting, rustic base for the meal.
Butter and Cheese: Switzerland is renowned for its high-quality dairy products, and no Swiss breakfast would be complete without a generous spread of butter. Locally produced cheeses, like Emmental, Gruyère, or Tilsit, are commonly served alongside the bread. Some Swiss people even enjoy cheese with a slice of bread as a simple, satisfying combination.
Yogurt and Muesli: Swiss muesli, often attributed to Dr. Maximilian Bircher-Brenner, is a popular breakfast choice. Made from rolled oats, nuts, dried fruits, and fresh apples, muesli is typically soaked overnight in yogurt or milk, making it a nourishing and filling option. A bowl of yogurt (either plain or fruit-flavored) can also be enjoyed on its own or as part of the muesli.
Coffee or Tea: Swiss breakfasts are commonly accompanied by a cup of coffee or tea. Coffee in Switzerland is typically strong and served black, though lattes and cappuccinos are also popular in cafes. For those who prefer something gentler, tea (often black or herbal) is a refreshing option. In some regions, hot chocolate is a beloved morning drink, especially in the colder months.
Fruits and Fresh Juices: Fresh fruits, such as apples, pears, and berries, are often included to provide a natural sweetness and a healthy start to the day. Swiss people might also enjoy a glass of freshly squeezed juice—orange or apple juice being the most common.
Cold Cuts and Eggs: In some parts of Switzerland, a savory breakfast might feature cold cuts of meat, such as Swiss ham or salami, paired with boiled or scrambled eggs. This provides a more protein-rich option for those looking for a more substantial breakfast. Swiss-style scrambled eggs are often soft and creamy, made with butter or cream for extra richness.
Pairing with Beverages
Choosing the right beverage to accompany your meal can elevate the overall dining experience, and Swiss breakfasts, with their diverse offerings, are no exception. Whether you’re enjoying the simplicity of freshly baked bread with butter and cheese or indulging in a heartier muesli, here are some classic Swiss beverage pairings to complement your meal:
Regional specialties: In some Swiss regions, local drinks add a unique touch to the breakfast table. For example, in the French-speaking regions of Switzerland, café au lait is a very popular pairing, often enjoyed with butter croissants or pains au chocolat. In the Alpine regions, people can enjoy a hot kirsch (a light cherry brandy) mixed with hot water, a drink that goes wonderfully with Swiss mountain cheeses and hearty breakfasts. These regional drinks offer a taste of Swiss heritage and culture, adding authenticity to the breakfast experience.
Coffee: Coffee is an integral part of Swiss culture, and it’s the go-to beverage for many at breakfast. Swiss coffee is typically strong and served black, making it a perfect companion to buttery pastries, hearty bread, or the rich flavors of Swiss cheese. For a lighter, creamier option, you can pair your meal with a cappuccino, café crème, or a latte. The slight bitterness of the coffee contrasts beautifully with sweet items like jams or honey, while also cutting through the richness of cheeses and butters.
Tea: If you prefer something gentler than coffee, tea is an excellent alternative. In Switzerland, black tea and herbal infusions are the most common choices. A classic breakfast pairing might be a strong black tea, such as Assam or Earl Grey, which pairs well with bread and cheese or a lighter fruit-based breakfast. Herbal teas, like chamomile or mint, offer a refreshing, soothing option for those seeking a more calming start to the day. These are ideal when paired with lighter options like muesli or fresh fruits.
Hot Chocolate: For a comforting and indulgent drink, hot chocolate is a beloved choice, particularly in colder months. The Swiss are renowned for their quality chocolate, and hot chocolate can be a rich, velvety drink that pairs wonderfully with both sweet and savory items. The sweetness of hot chocolate complements fresh pastries or a slice of Swiss rye bread with butter, and it’s especially delightful when paired with Swiss chocolate croissants or fruit-filled baked goods. For a more grown-up version, you might opt for a spiced hot chocolate with a dash of cinnamon or chili.
Fresh Juices: Freshly squeezed juices, such as orange juice or apple juice, are common in Swiss breakfasts and provide a refreshing, natural sweetness to balance the richness of the meal. Orange juice is particularly refreshing and pairs well with both sweet (like muesli or fruit) and savory options (like eggs or cold cuts). Apple juice, often local and freshly pressed, is another great choice that adds a light, crisp contrast to the heavier elements of the meal. For a more unique twist, try a freshly squeezed berry juice, which pairs beautifully with yogurt or fresh fruit.
Milk: A classic Swiss beverage choice, milk is enjoyed with many breakfast items, especially by those who prefer a traditional and wholesome start to the day. It’s a perfect pairing with muesli or granola, providing the necessary creaminess to complement the oats and fruits. Milk also pairs well with cheese, adding a touch of smoothness to balance the savory flavors. For a fun variation, you might try a flavored milk (such as chocolate milk) when enjoying Swiss pastries or light cakes.
Sparkling Water: If you’re looking for a neutral yet refreshing drink, sparkling water is a great choice. Its effervescence cleanses the palate between bites, especially if you’re enjoying a rich Swiss cheese or a savory bread with butter. Sparkling water is a versatile beverage that goes well with nearly every element of a Swiss breakfast, providing a light, crisp option that doesn’t overwhelm the flavors of the food. For an added touch of flavor, you can opt for sparkling water with a twist of lemon or lime.
Storage Tips
Proper storage helps maintain the freshness and flavor of your Swiss breakfast ingredients. Here’s how to store them:
Leftovers: Store leftovers in airtight containers in the refrigerator or freezer. Reheat thoroughly before eating.
Bread: Store freshly baked bread in a bread box or paper bag at room temperature. For longer storage, slice and freeze it. Toast or warm before eating.
Cheese: Wrap cheese in wax paper or parchment, then place in an airtight container in the fridge. Let it come to room temperature before serving.
Yogurt: Keep yogurt sealed and refrigerated. Consume within a few days of opening.
Muesli: Store muesli in an airtight container in a cool, dry place. If soaked, keep it in the fridge and eat within 1-2 days.
Butter & Spreads: Refrigerate butter, but keep a small portion at room temperature for spreading. Store jams and honey in a cool, dry place.
Fruits: Refrigerate berries and cut fruits. Store bananas, citrus, and avocados at room temperature until ripe.
Cold Cuts & Eggs: Store cold cuts in an airtight container in the fridge. Keep eggs in their carton in the coldest part of the fridge.
Coffee & Tea: Keep coffee beans in an airtight container in a cool, dark place. Store tea in a sealed container away from light and moisture.
Conclusion
Making Gipfeli at home is a rewarding experience that brings the rich, buttery flavor of Switzerland right to your kitchen. With a little patience and the right ingredients, you can create these delightful pastries that are perfect for any time of day. Whether you enjoy them fresh from the oven or as part of a leisurely breakfast, these homemade Gipfeli will undoubtedly become a favorite in your baking repertoire. Enjoy the process, and most importantly, enjoy the delicious result!
Recette Gipfeli : Guide de la pâtisserie suisse authentique en 5 étapes
Le bon poulet hip hop – labelrecipes.com

