
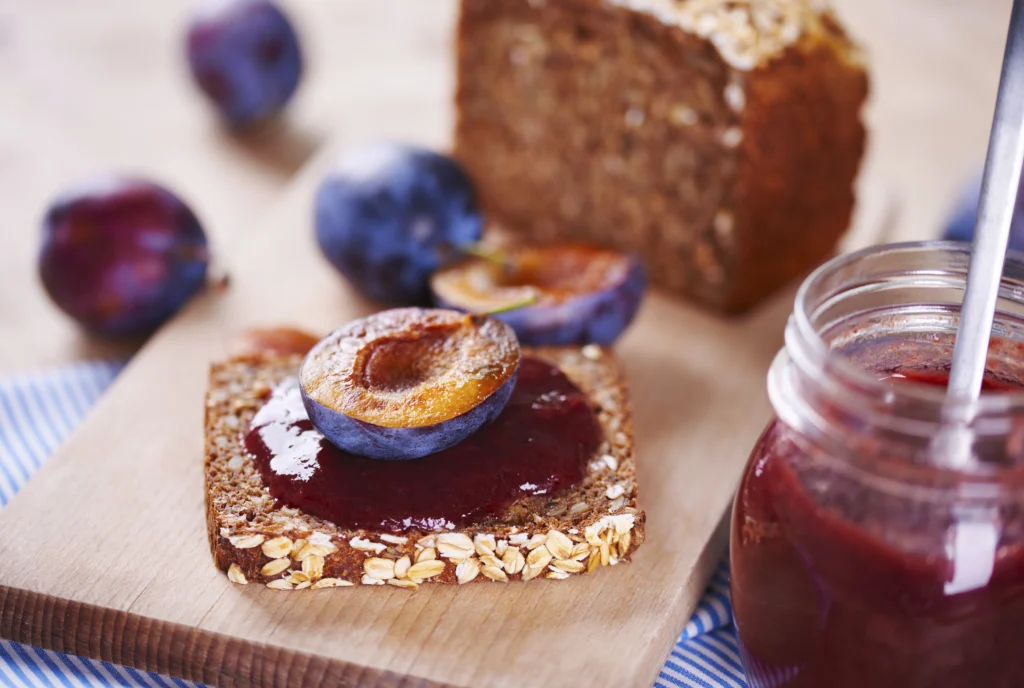
Looking for a delicious way to make the most of fresh plums? This Quick and Easy Plum Jelly Recipe from Scratch is the perfect solution. With just a few simple ingredients and minimal effort, you can create a smooth, sweet jelly that’s bursting with fruity flavor. Whether you’re spreading it on toast, dolloping it over desserts, or gifting it in jars, this homemade plum jelly will quickly become a kitchen favorite. Let’s get started on making this sweet treat!
Why You’ll Love This Plum Jelly Recipe
It’s Incredibly Simple and Beginner-Friendly
You don’t need any fancy tools or prior experience to make this plum jelly. With just a few ingredients and basic kitchen equipment, you’ll be able to create a beautifully clear, flavorful jelly that looks like something straight out of a gourmet pantry. The straightforward steps make it ideal for beginners or busy home cooks looking for a quick project.
Full of Natural, Fresh Plum Flavor
Unlike store-bought jellies that often contain artificial flavors or excessive sugar, this homemade version captures the rich, slightly tart essence of real, ripe plums. The result is a vibrant, jewel-toned jelly that’s both fruity and refreshing, with just the right balance of sweet and tangy.
Perfect for Preserving the Season
Plum season doesn’t last long, but this recipe lets you enjoy their flavor all year round. Making jelly is a great way to reduce food waste by using up a bounty of fresh plums before they spoil—and it’s also a fun tradition that celebrates seasonal eating.
Versatile and Family-Approved
This plum jelly isn’t just for toast (though it’s amazing on warm, buttered bread). You can drizzle it over pancakes, swirl it into yogurt, use it in baked goods, or serve it with cheese and crackers. It’s a family-friendly staple that adds a homemade touch to everyday meals and special occasions alike.
Ingredients You’ll Need for Plum Jelly
Creating delicious plum jelly at home starts with just a few simple ingredients. Here’s what you’ll need to gather before getting started:
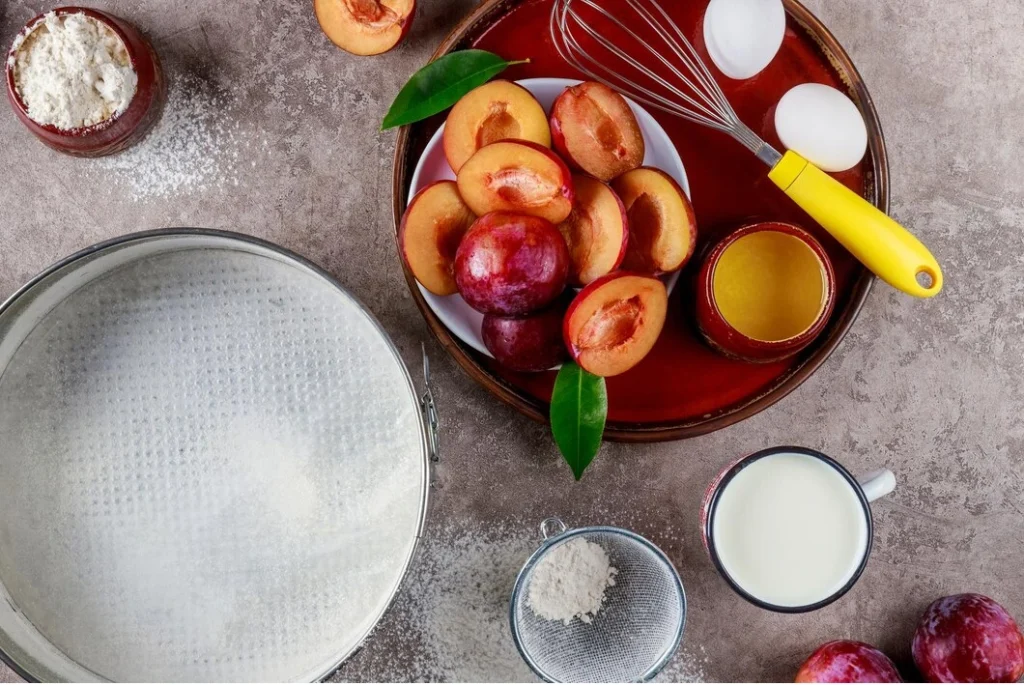
1. Fresh Ripe Plums
Choose ripe, juicy plums for the best flavor and color. Any variety will work—red, black, or even yellow plums—but red and black plums typically yield a deeper, richer jelly. You’ll need about 4 pounds (1.8 kg) of plums to make a standard batch.
2. Granulated Sugar
Sugar is essential for both sweetness and helping the jelly set. Depending on your plums’ natural sweetness, you’ll typically use about 4 cups (800g) of sugar. You can adjust slightly based on personal taste, but don’t reduce it too much or the jelly may not preserve well.
3. Lemon Juice
Fresh lemon juice adds brightness and acidity, which helps balance the sweetness of the plums and aids the natural pectin in setting the jelly. Use about 2 tablespoons of lemon juice (roughly one medium lemon).
4. Water
Water is needed to help extract the juice from the plums during the cooking process. You’ll use just enough to prevent the fruit from sticking—usually around 1 to 1.5 cups (250–375 ml).
5. Optional: Natural Pectin
If your plums are low in natural pectin (often the case with overripe or very soft fruit), you can add commercial pectin to help the jelly set more reliably. Use according to the package instructions. However, many traditional recipes rely solely on the fruit’s own pectin and longer boiling time.
6. Sterilized Jars and Lids
To store your plum jelly safely, you’ll need glass jars with tight-fitting lids, sterilized before use. This step is crucial to prevent spoilage and ensure your jelly keeps well on the shelf.
Step-by-Step Instructions for Making Plum Jelly
Making plum jelly from scratch may sound intimidating, but it’s easier than you think. Follow these simple steps to create a vibrant, flavorful jelly that you’ll want to spread on everything.
1. Wash, Pit, and Chop the Plums
Start by thoroughly washing about 4 pounds (1.8 kg) of ripe plums under cool water. Cut them in half, remove the pits, and chop them into smaller pieces—there’s no need to peel them. The skins actually help give the jelly a deep color and natural pectin.
2. Cook the Plums to Extract Juice
Place the chopped plums into a large, heavy-bottomed pot. Add just enough water to cover the bottom (about 1 to 1.5 cups). Bring to a boil, then reduce heat and simmer for 20–25 minutes, stirring occasionally, until the fruit softens and breaks down.
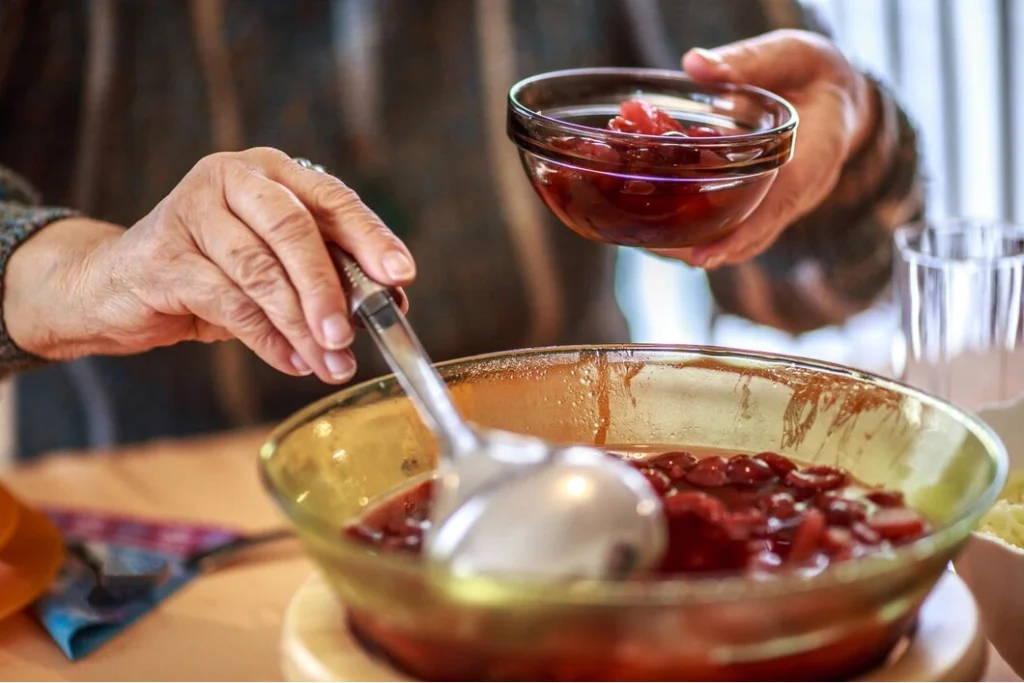
3. Strain the Juice
Once the plums are soft and juicy, pour the mixture through a fine mesh sieve or cheesecloth into a large bowl. Let it drip naturally—avoid squeezing, as that can make the jelly cloudy. You should end up with about 4 cups of juice.
4. Combine Juice, Sugar, and Lemon Juice
Pour the strained plum juice back into the cleaned pot. Add about 4 cups (800g) of sugar and 2 tablespoons of lemon juice. Stir to dissolve the sugar completely. If you’re using pectin, follow the brand’s instructions and add it at this stage.
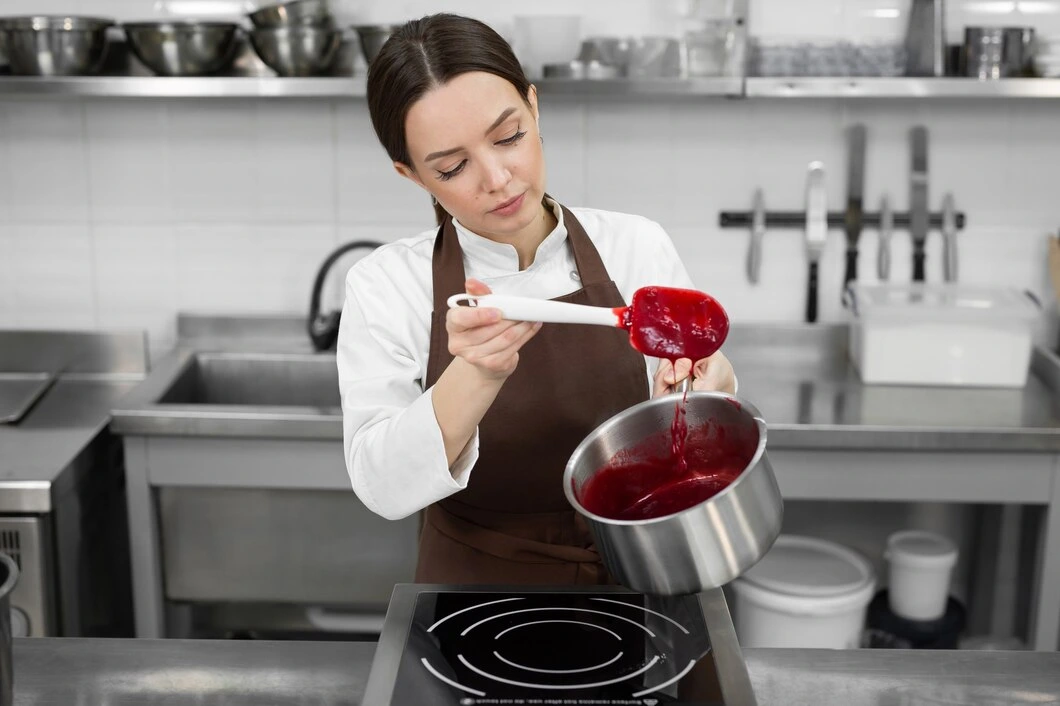
5. Boil Until the Jelly Sets
Bring the mixture to a rolling boil over medium-high heat. Let it boil hard, stirring frequently to avoid burning. It will start to thicken after about 20–30 minutes. To test if it’s ready, use:
- The wrinkle test: Place a spoonful on a cold plate, let it sit for 30 seconds, then push it with your finger—if it wrinkles, it’s ready.
- A candy thermometer: The jelly sets at 220°F (104°C).
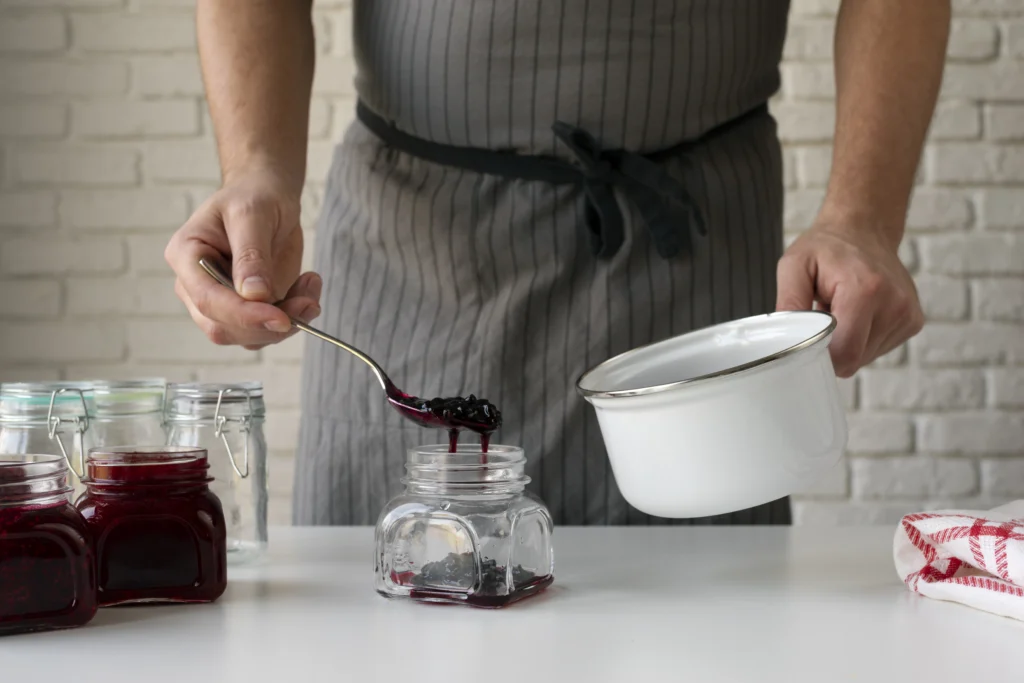
6. Pour into Sterilized Jars
Once the jelly reaches the right consistency, remove it from heat and carefully ladle it into sterilized jars, leaving about 1/4 inch of space at the top. Wipe the rims, seal with lids, and process in a boiling water bath for 10 minutes for long-term storage—or let them cool and refrigerate if consuming within a few weeks.
Tips for Perfecting Your Plum Jelly
Even simple recipes can benefit from a few expert tricks. Here are some tried-and-true tips to help you get that perfect consistency, clarity, and flavor every time:
1. Don’t Rush the Juice Straining
After cooking your plums, resist the urge to squeeze the cheesecloth or press the pulp through the strainer. Letting the juice drip slowly may take time, but it ensures your jelly will be clear and free of unwanted pulp or cloudiness.
2. Use a Candy Thermometer
Hitting the right temperature is key to getting your jelly to set properly. A thermometer makes it foolproof—you’re aiming for 220°F (104°C) at sea level. Keep in mind that if you’re at a higher altitude, you’ll need to reduce the target temperature slightly (about 2°F for every 1,000 feet above sea level).
3. Test Set Before Jarring
Use the cold plate or wrinkle test to check if your jelly is ready. Place a small spoonful on a plate that’s been chilled in the freezer. Let it cool, then push it with your finger. If it wrinkles and holds shape, it’s done. If not, continue boiling and test again in a few minutes.
4. Sterilize Your Jars Properly
Always sterilize your jars and lids before pouring in your jelly. Boil them for at least 10 minutes, or run them through a hot dishwasher cycle. This prevents contamination and extends shelf life, especially if you plan to store your jelly at room temperature.
5. Add Flavor Variations for a Unique Twist
Don’t be afraid to experiment! Add a cinnamon stick or a pinch of ground cloves during the boiling stage for a warm spice note. A splash of vanilla extract, ginger, or even a touch of red wine can give your plum jelly a unique and gourmet edge.
Ways to Enjoy Your Homemade Plum Jelly
Now that you’ve created a delicious jar of plum jelly, it’s time to put it to good use! Here are some simple and creative ways to enjoy it throughout your day:
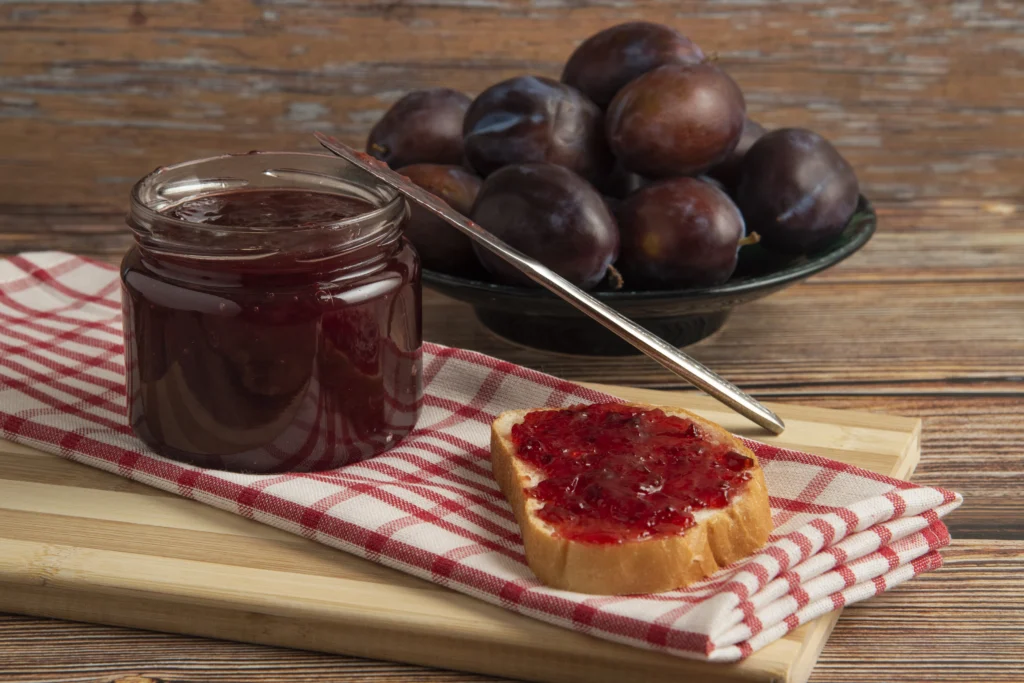
1. Spread It on Toast, Muffins, or Biscuits
The classic use—and for good reason! A generous spread of plum jelly on warm, buttered toast or freshly baked biscuits is pure comfort food. It also pairs beautifully with scones, pancakes, or crêpes for a cozy breakfast or brunch.
2. Use It as a Glaze for Meats
Plum jelly makes a fantastic glaze for roasted meats, especially pork, chicken, or duck. Just warm it up and brush it over meat during the final minutes of roasting or grilling for a sweet-savory finish.
3. Pair It with Cheese Boards
Add a spoonful of plum jelly to your next cheese or charcuterie board. It complements aged cheeses like brie, goat cheese, sharp cheddar, or blue cheese beautifully, and adds a sweet contrast to salty cured meats.
4. Swirl It into Yogurt, Oatmeal, or Ice Cream
Stir a spoonful into plain yogurt or overnight oats for a fruity boost. You can also drizzle it over vanilla ice cream or frozen yogurt for a quick, elegant dessert.
5. Bake It into Desserts
Use plum jelly as a filling for thumbprint cookies, layer it into cakes or bars, or spread it between cake layers instead of frosting. It adds a bright flavor and a lovely jewel-toned color to your baked goods.
Table of Contents
Frozen Mango Margarita Recipe with a Tropical Twist – labelrecipes.com
Good https://is.gd/N1ikS2
thank you so much
Very good https://is.gd/N1ikS2
Good https://is.gd/N1ikS2
thank you so much
Good https://is.gd/N1ikS2
THANK YOU SO MUCH
Good https://is.gd/N1ikS2
THANK YOU SO MUCH
hi
HI HOW ARE YOU
Awesome https://is.gd/N1ikS2
THANK YOU SO MUCH
Good https://is.gd/N1ikS2
thank you so much
Awesome https://is.gd/N1ikS2
thank you so much
Awesome https://is.gd/N1ikS2
thank you so much
Good https://is.gd/N1ikS2
thank you so much
Awesome https://is.gd/N1ikS2
thank you so much