
A Sweet Moment You’ll Want to Recreate
You know that feeling when something simple turns out unexpectedly perfect? That’s exactly what happens the first time you make your own marshmallows. You start with a few basic ingredients, a bit of curiosity, and before you know it, you’re holding soft, pillowy squares that taste nothing like the ones from a bag.
This isn’t just another dessert—it’s a small kitchen win that stays with you. Maybe it reminds you of childhood treats, late-night hot chocolate, or cozy family moments. Or maybe it becomes your new signature recipe. Either way, once you try this marshmallow recipe, you’ll catch yourself thinking: Why didn’t I make these sooner?
Why This Marshmallow Recipe Is Truly Unforgettable
Homemade vs Store-Bought: A Real Difference
When you make your own marshmallows, you immediately notice the contrast. The texture is lighter, almost creamy. The flavor feels cleaner, not overly sweet or artificial.
Here’s why this marshmallow recipe stands out:
- You control every ingredient
- No preservatives or hidden additives
- Freshness you can actually taste
- Endless room for creativity
Store-bought marshmallows are convenient—but they’re designed for shelf life, not flavor. Yours? They’re made to be enjoyed at their best.
The Texture That Changes Everything
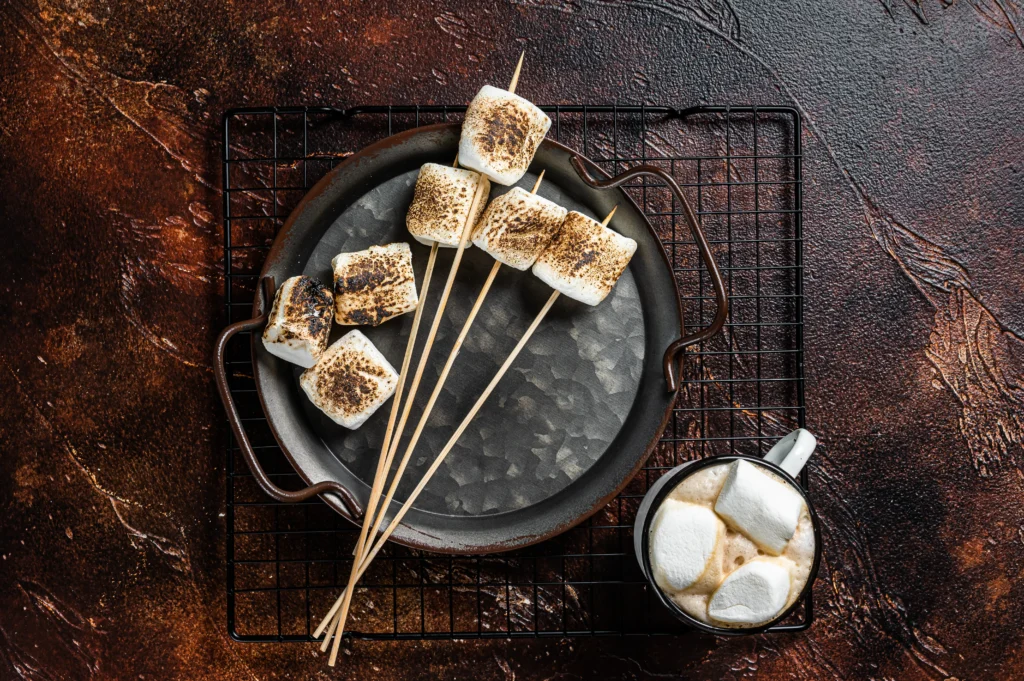
What you’re aiming for isn’t just sweetness—it’s that soft, airy bite that melts slowly. The kind that makes hot chocolate richer and s’mores unforgettable.
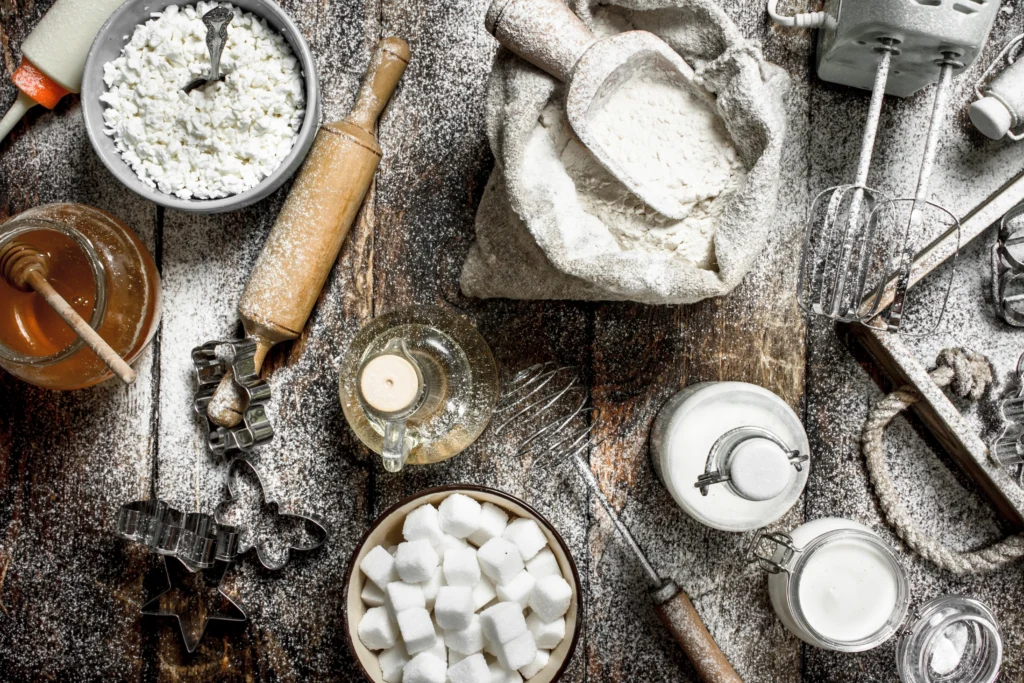
Essential Ingredients for the Perfect Marshmallow Recipe
Before you start, it helps to understand why each ingredient matters. This isn’t just mixing sugar—you’re building structure and texture.
Ingredient Table
| Ingredient | Quantity | Role in the Recipe |
|---|---|---|
| Gelatin | 3 tbsp | Gives marshmallows their structure |
| Granulated Sugar | 2 cups | Adds sweetness and stability |
| Corn Syrup | 1 cup | Prevents sugar crystallization |
| Water | 1/2 cup | Helps dissolve and hydrate |
| Vanilla Extract | 1 tbsp | Adds depth of flavor |
| Powdered Sugar | As needed | Prevents sticking |
Optional Add-Ins to Elevate Flavor
- Cocoa powder for a chocolate twist
- Strawberry or raspberry extract
- Peppermint for a refreshing bite
- Food coloring for visual appeal
Ingredient Tips You’ll Appreciate
- Use high-quality vanilla—it makes a difference
- Don’t skip corn syrup unless you have a tested substitute
- Fresh gelatin ensures better texture
Step-by-Step Marshmallow Recipe (Easy & Foolproof)
This is where the magic happens. Follow these steps carefully, and you’ll get consistent results every time.
1. Bloom the Gelatin
- Pour gelatin into a bowl with water
- Let it sit for 5–10 minutes
This step ensures your marshmallows set properly.
2. Heat the Sugar Mixture
- Combine sugar, corn syrup, and water
- Heat until it reaches 240°F (soft-ball stage)
A candy thermometer is your best friend here. Precision matters.
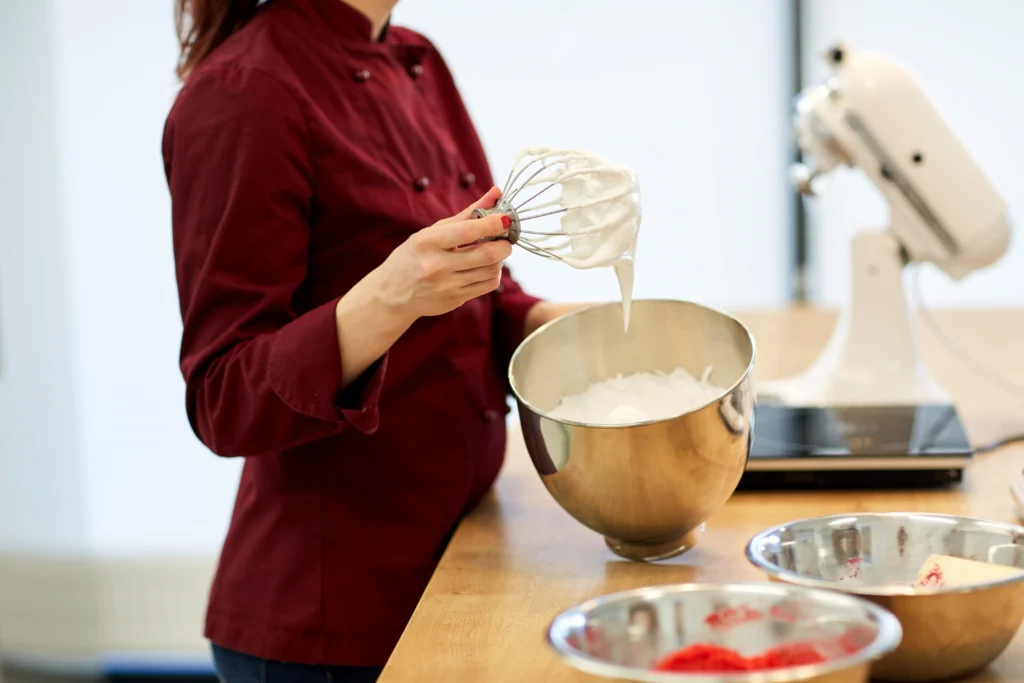
3. Combine and Whip
- Slowly pour hot syrup into the gelatin
- Beat on high speed for 10–15 minutes
You’ll see it transform into a thick, glossy mixture.
4. Add Flavor
- Mix in vanilla or your chosen flavor
5. Pour and Set
- Transfer into a greased and dusted pan
- Let it sit for at least 4 hours (or overnight)
Pro Tips for Success
- Don’t rush the whipping stage
- Grease everything—it gets sticky fast
- Work quickly once the mixture is ready
Flavor Variations to Elevate Your Marshmallow Recipe
Once you’ve mastered the base, it’s time to experiment.
Classic Variations
- Chocolate marshmallows
- Berry-flavored marshmallows
- Coffee-infused marshmallows
Creative Twists
- Swirl two colors for a marbled look
- Dip finished marshmallows in melted chocolate
- Roll them in coconut or crushed nuts
Seasonal Ideas
- Peppermint for winter holidays
- Citrus for summer freshness
- Pumpkin spice for fall
This marshmallow recipe becomes your playground.
Storage Tips – Keep Your Marshmallows Fresh Longer
Homemade marshmallows don’t last forever—but that’s part of their charm.
Best Storage Practices
- Store in an airtight container
- Keep at room temperature
- Avoid humidity
Shelf Life
- Best within 1–2 weeks
- Can be frozen if sealed properly
Watch for These Signs
- Excessive stickiness
- Hard texture
- Loss of flavor
Common Mistakes to Avoid in Your Marshmallow Recipe
Even a simple recipe can go wrong if you miss a detail.
Top Mistakes
- Overheating sugar (leads to hard marshmallows)
- Under-whipping (results in flat texture)
- Skipping pan preparation
Quick Fixes
- Too sticky? Add more powdered sugar
- Too dense? Whip longer next time
- Didn’t set? Check gelatin quality
Learning from these mistakes is what turns a good cook into a confident one.
Serving Ideas – Make Your Marshmallow Recipe Even More Fun
Now comes the fun part—enjoying what you made.
Simple Ways to Serve
- Drop into hot chocolate
- Toast over a flame
- Add to desserts
Creative Presentation Ideas
- Gift boxes with homemade marshmallows
- Dessert boards with dips and toppings
- Party stations for DIY s’mores
Moments That Call for Marshmallows
- Family gatherings
- Cozy evenings
- Celebrations and holidays
FAQ – Marshmallow Recipe Questions Answered
Can you make this marshmallow recipe without corn syrup?
Yes, you can use honey or glucose syrup, though the texture may slightly change.
Why is your marshmallow recipe too sticky?
It usually means it wasn’t whipped long enough or needs more coating.
How long does this marshmallow recipe last?
Stored properly, up to two weeks.
Can you make a vegan marshmallow recipe?
Yes, by replacing gelatin with agar-agar.
Is this marshmallow recipe beginner-friendly?
Absolutely. With attention to detail, even first-timers can succeed.
Conclusion – A Recipe You’ll Keep Coming Back To
This marshmallow recipe isn’t just about making sweets—it’s about creating something memorable with your own hands. The process is simple enough to follow, yet satisfying enough to make you proud every single time.
Once you taste the difference, it’s hard to go back. And that’s the beauty of it—you won’t want to.
Call-to-Action
Now it’s your turn. Try this marshmallow recipe in your kitchen and see the difference for yourself. Experiment with flavors, share it with your family, or even turn it into a tradition.
👉 If you enjoyed this recipe, save it, share it, and let others experience it too.
👉 Got your own twist? Tell your story—you might inspire someone else to start.
Because sometimes, the simplest recipes create the sweetest memories.
Table of Contents
https://labelrecipes.com/holiday-rum-punch-recipe-to-impress-your-guests/
This article is good and clear. The site is useful and convenient.