

Some desserts impress you with elaborate decorations. Others win you over before you have even finished the first bite. Nanaimo Bars belong firmly in the second group.
You cut through the glossy chocolate topping and discover a pale, creamy custard center resting on a rich cocoa base filled with coconut, crumbs, and finely chopped nuts. Each layer brings something different: a gentle snap from the chocolate, softness from the filling, and a pleasantly chewy finish underneath.
The experience often feels familiar, even when you are tasting a Nanaimo Bar for the first time. It is the kind of dessert that belongs beside a warm drink, on a holiday tray, or in the center of a family gathering where everyone quietly returns for another square.
This Nanaimo Bars recipe shows you how to create those three distinctive layers without turning the process into an all-day baking project. You do not need an oven, advanced pastry skills, or difficult-to-find equipment. You simply need good ingredients, a little patience between layers, and enough refrigerator space to let everything set properly.
Once you understand how each layer works, you can make smooth, attractive Nanaimo Bars that slice cleanly and taste every bit as indulgent as they look.
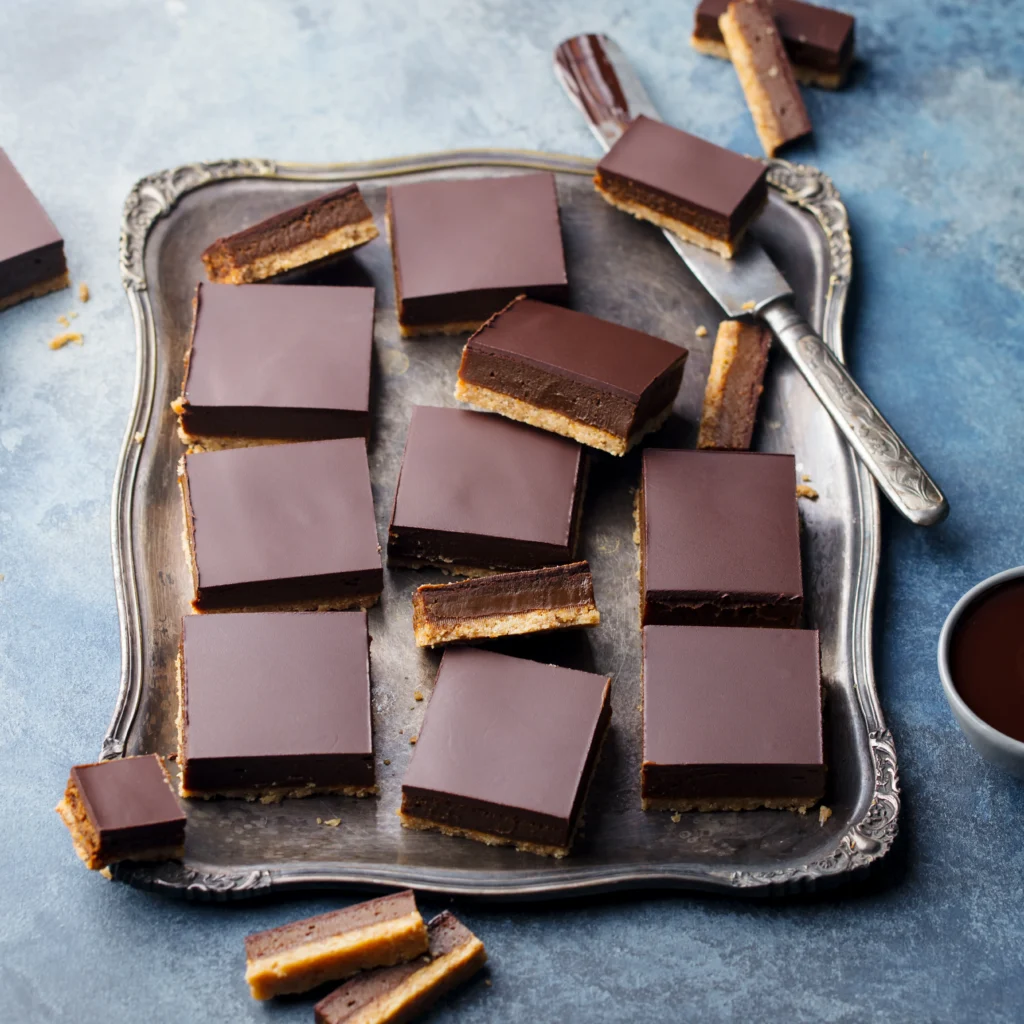
What Are Nanaimo Bars?
Nanaimo Bars are a classic Canadian dessert made with three separate layers:
- A chocolate, coconut, nut, and graham cracker base
- A sweet custard-flavored buttercream filling
- A smooth chocolate topping
Unlike brownies, blondies, and most layered dessert bars, traditional Nanaimo Bars are not baked. The base is prepared on the stovetop, pressed into a pan, and chilled. The custard filling and chocolate topping are then added separately.
The result is a compact but remarkably rich dessert. Because every layer has its own flavor and texture, a small square is usually enough to satisfy a serious chocolate craving.
The Story Behind This Canadian Dessert
Nanaimo Bars take their name from Nanaimo, a city on Vancouver Island in British Columbia. Although the dessert’s precise early history remains debated, it became closely associated with the city and eventually developed into one of Canada’s best-known sweet treats.
In 1986, a local contest was organized to choose an “ultimate” Nanaimo Bar recipe. Almost 100 variations were submitted, and Joyce Hardcastle’s version was selected as the winner. The City of Nanaimo still presents the classic three-layer recipe and acknowledges that the dessert’s earliest documented origins remain somewhat mysterious.
That uncertain history has not hurt its popularity. Nanaimo Bars now appear at celebrations, bakeries, cafés, Christmas gatherings, bake sales, and dessert tables well beyond British Columbia.
Why Nanaimo Bars Are So Popular
You get several appealing qualities in one simple square:
- No oven is required.
- Each layer offers a different texture.
- The bars can be prepared ahead of time.
- They freeze well.
- The recipe is easy to customize.
- Their neat layers make them attractive on a dessert tray.
- You can cut them into small portions for parties.
The combination of cocoa, coconut, custard, and chocolate is also distinctive. It tastes familiar enough to feel comforting but unusual enough to stand apart from ordinary chocolate bars.
Nanaimo Bars Recipe at a Glance
| Recipe detail | Information |
|---|---|
| Preparation time | About 30 minutes |
| Chilling time | 2½ to 3 hours |
| Cooking method | No-bake with brief stovetop heating |
| Pan size | 8-inch or 20-centimeter square pan |
| Yield | 16 large or 25 small bars |
| Difficulty | Beginner-friendly |
| Best serving temperature | Cool but not frozen |
| Storage | Refrigerator or freezer |
You will get the cleanest layers from an 8-inch square metal pan. A glass pan also works, although the bars may take slightly longer to become firm.
Ingredients for the Best Nanaimo Bars Recipe
Quality matters in a dessert with so few components. You do not need the most expensive chocolate or butter available, but each ingredient should taste good on its own.
Complete Nanaimo Bars Ingredients
| Layer | Ingredient | Amount |
|---|---|---|
| Base | Unsalted butter | ½ cup or 113 grams |
| Base | Granulated sugar | ¼ cup or 50 grams |
| Base | Unsweetened cocoa powder | 5 tablespoons or 30 grams |
| Base | Large egg, preferably pasteurized | 1 |
| Base | Vanilla extract | 1 teaspoon |
| Base | Graham cracker crumbs | 1¾ cups or 210 grams |
| Base | Unsweetened shredded coconut | 1 cup or 85 grams |
| Base | Finely chopped almonds or walnuts | ½ cup or 60 grams |
| Filling | Unsalted butter, softened | ½ cup or 113 grams |
| Filling | Vanilla custard powder | 2 tablespoons |
| Filling | Heavy cream or whole milk | 3 tablespoons |
| Filling | Powdered sugar | 2 cups or 240 grams |
| Filling | Fine salt | ⅛ teaspoon |
| Topping | Semisweet or dark chocolate | 115 grams or 4 ounces |
| Topping | Unsalted butter | 2 tablespoons |
Equipment You Will Need
- An 8-inch square pan
- Parchment paper
- A heatproof bowl
- A saucepan or double boiler
- A rubber spatula
- An electric hand mixer
- A sharp knife
- A food thermometer, recommended
- A small offset spatula, optional
Choosing Chocolate for Rich Nanaimo Bars
Semisweet chocolate is usually the safest choice. It gives you a rich topping without becoming excessively bitter or sweet.
Dark chocolate containing around 55% to 65% cocoa creates a deeper flavor. Milk chocolate can be used, but it produces a sweeter and softer topping. If your custard filling is already quite sweet, semisweet or dark chocolate provides better balance.
Avoid chocolate chips when possible. Many chips contain stabilizers that help them retain their shape during baking. A chopped chocolate bar usually melts more smoothly and produces a cleaner topping.
What Is Custard Powder?
Custard powder is a flavored starch mixture commonly used to prepare custard sauce. In Nanaimo Bars, you use it dry rather than cooking it into custard.
It adds the traditional pale color, mild vanilla flavor, and recognizable custard character to the middle layer.
Vanilla custard powder is ideal. When it is unavailable, you can substitute an equal amount of instant vanilla pudding mix. The flavor will not be identical, but the filling will still be creamy and delicious.
How to Make Nanaimo Bars Step by Step
The recipe becomes much easier when you treat each layer as a separate task. Finish one layer, chill it, and then move to the next.
H3: Step 1: Prepare the Pan
Line your square pan with parchment paper, leaving extra paper hanging over two opposite sides. These overhanging edges will act as handles when you lift the chilled slab from the pan.
Lightly grease any exposed areas of the pan.
Do not skip the parchment. Removing and slicing the bars is considerably harder when they are pressed directly into the pan.
Step 2: Make the Chocolate Coconut Base
Place the butter, granulated sugar, and cocoa powder in a heatproof bowl over a saucepan containing gently simmering water. The bowl should sit above the water rather than touching it.
Stir until the butter melts and the mixture becomes glossy.
Whisk the egg in a separate bowl. Slowly add it to the warm chocolate mixture while stirring continuously. Continue heating and stirring until the mixture thickens slightly.
For food safety, an egg-containing mixture should reach 160°F or 71°C. Using a pasteurized egg is another suitable option, especially when you do not have a thermometer.
Remove the bowl from the heat. Stir in the vanilla, graham cracker crumbs, shredded coconut, and chopped nuts.
The mixture should look moist and hold together when pressed. Transfer it to your prepared pan and spread it into an even layer.
How to Press the Base Evenly
Place a small sheet of parchment over the mixture and press down with the bottom of a measuring cup. Pay particular attention to the corners and edges.
A tightly compressed base gives your Nanaimo Bars a firm structure. When the base is left loose, the bottom layer may crumble during slicing.
Refrigerate it for at least 30 minutes.
Step 3: Make the Custard Filling
Place the softened butter in a mixing bowl. Beat it for one to two minutes until smooth and slightly lighter in color.
Add the custard powder, cream, and salt. Mix on low speed until combined.
Gradually add the powdered sugar. Once the loose sugar has been incorporated, increase the mixer speed and beat for two to three minutes.
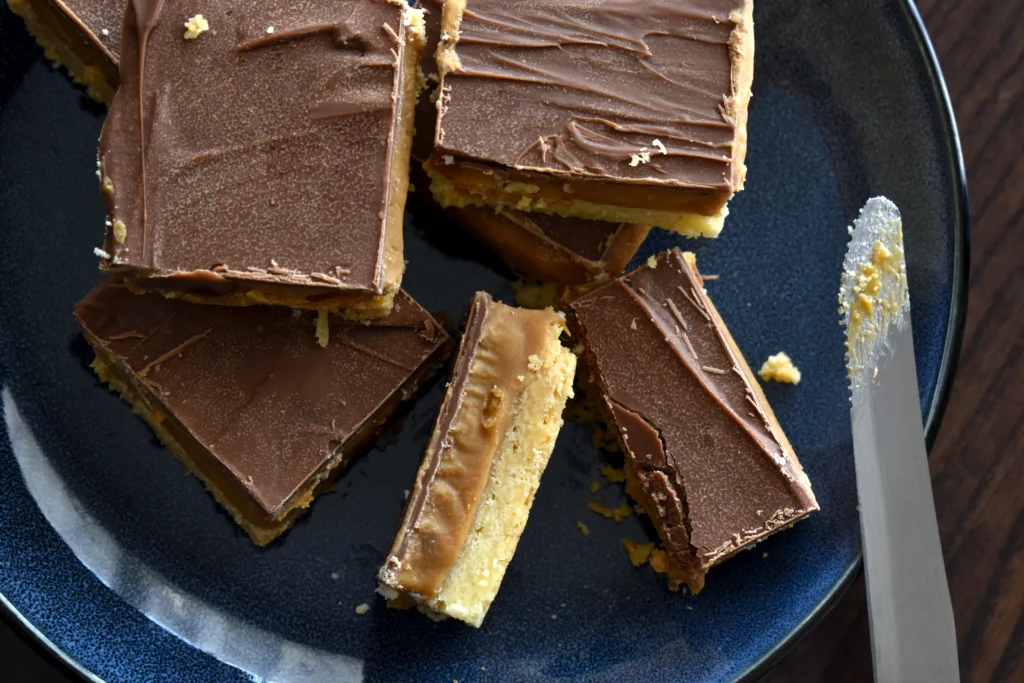
The finished filling should be pale, smooth, and spreadable. It should hold its shape without feeling dry or stiff.
Spread the filling over the chilled base with a spatula. Work gently so you do not pull crumbs into the custard layer.
Smooth the top, then return the pan to the refrigerator for 45 to 60 minutes.
Fixing the Filling Consistency
When your filling seems too thick, mix in one teaspoon of cream at a time.
When it seems too loose, add powdered sugar one tablespoon at a time. Avoid adding a large quantity at once, or the filling may become excessively sweet.
The butter may have been too warm if the mixture looks greasy. Refrigerate the bowl for 10 minutes, then beat it again.
Step 4: Add the Chocolate Topping
Place the chopped chocolate and butter in a heatproof bowl. Melt them over gently simmering water, stirring until completely smooth.
You can also microwave the mixture in short 15-second intervals. Stir after each interval to prevent the chocolate from overheating.
Let the melted chocolate cool for about five minutes. It should remain fluid but should not feel hot.
Pour it over the firm custard layer and spread it quickly into an even coating.
Refrigerate the Nanaimo Bars until the chocolate is almost set, usually 15 to 20 minutes.
Step 5: Score, Chill, and Slice
Remove the pan while the topping is firm but not completely hard. Lightly score the chocolate where you plan to make each cut.
Return the pan to the refrigerator and chill the complete dessert for at least one additional hour.
Lift the slab from the pan using the parchment handles.
Warm a sharp knife under hot water, wipe it dry, and cut along the scored lines. Clean and warm the blade again between cuts.
This method helps you produce neat squares without crushing the filling or shattering the chocolate.
Expert Tips for Perfect Nanaimo Bars
A straightforward recipe can still go wrong when the layers are rushed. These small adjustments make a noticeable difference.
Chill Every Layer
The base should feel firm before you add the custard. The custard should also be properly chilled before you pour over the chocolate.
When you add a new layer too soon, the previous layer can shift, melt, or blend into it.
Measure the Crumbs Carefully
Too many crumbs produce a dry, fragile base. Too few create a greasy layer that will not hold its shape.
For consistent results, weigh the crumbs when possible. If you use measuring cups, spoon the crumbs into the cup and level the surface rather than packing them tightly.
Let the Chocolate Cool Slightly
Very hot chocolate can soften the custard filling and create an uneven boundary between the layers.
Give the melted topping several minutes to cool before pouring it onto the bars.
Do Not Freeze Before Cutting
Freezing the entire slab makes the chocolate topping more likely to crack. Chill the bars in the refrigerator, cut them, and freeze the individual portions afterward.
Serve Them Slightly Softened
Straight from the refrigerator, Nanaimo Bars can be very firm. Let them sit at room temperature for 10 to 15 minutes before serving.
The filling becomes creamier, and the chocolate flavor is more noticeable once the bars lose their refrigerator chill.
Common Nanaimo Bars Problems and Solutions
| Problem | Likely cause | Solution |
|---|---|---|
| Base crumbles | It was not pressed firmly enough | Compress it with a flat measuring cup |
| Base feels greasy | Butter or crumbs were measured incorrectly | Recheck the ingredient ratio |
| Custard is runny | Butter was too warm or too much liquid was added | Chill briefly and beat again |
| Filling is too stiff | Too much powdered sugar | Add cream one teaspoon at a time |
| Chocolate cracks | The topping became too cold before cutting | Score it while partially set |
| Layers separate | The base or filling was overly smooth or frozen | Chill until firm but not frozen |
| Chocolate looks dull | It was overheated | Melt slowly over gentle heat |
| Bars are difficult to lift | Pan was not lined | Use parchment with overhanging edges |
Nanaimo Bars Variations
Once you have mastered the traditional Nanaimo Bars recipe, you can adjust the flavors without changing the basic method.
Mint Chocolate Nanaimo Bars
Add ¼ to ½ teaspoon of peppermint extract to the custard filling. Use a small amount at first because peppermint flavor can quickly become overpowering.
For a festive look, sprinkle crushed peppermint candy over the chocolate before it sets.
Coffee Nanaimo Bars
Dissolve one or two teaspoons of instant espresso powder in the cream before adding it to the filling.
Coffee deepens the cocoa flavor and reduces the impression of sweetness without making the bars taste strongly bitter.
Orange Chocolate Nanaimo Bars
Add finely grated orange zest to the base and a drop of orange extract to the filling.
Orange works particularly well with dark chocolate and gives the bars a brighter finish.
Peanut Butter Nanaimo Bars
Replace part of the butter in the filling with smooth peanut butter. You may need slightly less powdered sugar because peanut butter naturally thickens the mixture.
Use unsalted peanut butter so you can control the final flavor.
Nut-Free Nanaimo Bars
Leave out the chopped almonds or walnuts and increase the graham cracker crumbs by approximately ¼ cup.
Always check the labels on your chocolate, crumbs, coconut, and custard powder when preparing the bars for someone with a serious allergy.
Gluten-Free Nanaimo Bars
Replace regular graham cracker crumbs with certified gluten-free cookie crumbs.
Confirm that the custard powder, chocolate, and other packaged ingredients are also labeled gluten-free.
Coconut-Free Nanaimo Bars
You can replace the coconut with additional graham cracker crumbs, finely crushed digestive biscuits, or chopped nuts.
The texture will be different, but the base will remain rich and structured.
How to Store Nanaimo Bars
Refrigerating Nanaimo Bars
Place the sliced bars in an airtight container. Separate stacked layers with parchment paper so the chocolate surfaces do not stick together.
Stored correctly, Nanaimo Bars generally maintain their best texture for about five to seven days in the refrigerator.
Keep them away from strongly scented foods because the butter-based filling can absorb surrounding odors.
Freezing Nanaimo Bars
Nanaimo Bars are well suited to freezing, making them a convenient make-ahead dessert.
Arrange the cut bars in a single layer until firm. Wrap them individually or separate stacked layers with parchment paper. Store them in a freezer-safe container for up to three months for the best quality.
Thaw them overnight in the refrigerator or leave individual squares at room temperature for approximately 30 minutes.
Avoid repeated thawing and refreezing, which can affect the appearance of the chocolate and the texture of the filling.
How to Serve Nanaimo Bars
Because these bars are rich, you do not need large portions. Cutting an 8-inch pan into 25 small squares works well for parties, cookie exchanges, and mixed dessert platters.
You can serve them with:
- Hot coffee
- Black tea
- Cold milk
- Fresh berries
- Unsweetened whipped cream
- Vanilla ice cream
- Sliced oranges or strawberries
For a polished dessert tray, wipe your knife after every cut and arrange the bars with a small amount of space between them.
Frequently Asked Questions About Nanaimo Bars
What are Nanaimo Bars made of?
Traditional Nanaimo Bars have a chocolate base containing graham cracker crumbs, coconut, and nuts. The middle consists of custard-flavored buttercream, while the top is made from melted chocolate and butter.
Do Nanaimo Bars need to be refrigerated?
Yes. Refrigeration keeps the butter-based custard filling firm and helps the three layers maintain their structure.
You can leave the bars at room temperature briefly before serving, but they should be returned to the refrigerator when they are not being eaten.
Can you freeze Nanaimo Bars?
Yes. You can freeze sliced Nanaimo Bars in an airtight container for up to three months for the best flavor and texture.
Place parchment between the layers and thaw them in the refrigerator before serving.
Why are my Nanaimo Bars falling apart?
A crumbling base is usually caused by insufficient pressing, inaccurate measurements, or not enough chilling time.
Press the mixture firmly into the pan and refrigerate it before adding the custard filling.
Why did my chocolate topping crack?
Chocolate cracks when it becomes very cold and hard before slicing. Score the topping after it has partially set, then finish chilling the bars.
A warm, dry knife also helps you cut through the chocolate more cleanly.
Can I make Nanaimo Bars without custard powder?
Yes. Instant vanilla pudding mix can replace the custard powder in equal quantities.
You can also use cornstarch with additional vanilla, although the filling will not have the same traditional flavor.
Can I make Nanaimo Bars ahead of time?
Yes. In fact, preparing them a day in advance often improves the final texture because every layer has enough time to become firm.
Keep the pan covered in the refrigerator and slice the bars shortly before serving.
Are Nanaimo Bars completely no-bake?
They are commonly described as a no-bake dessert because they do not go into the oven. However, the traditional base contains an egg that must be heated properly on the stovetop or in a double boiler.
What makes this the best Nanaimo Bars recipe?
This version balances the sweetness of the custard with darker chocolate, gives the base enough moisture to hold together, and uses staged chilling to create distinct layers.
You also receive practical guidance for safely heating the base, preventing cracked chocolate, adjusting the filling, and cutting clean portions.
Conclusion: Make These Rich Nanaimo Bars Your Own
A great Nanaimo Bar is more than a sweet square with three attractive colors. It is a careful balance of textures.
You get a firm but tender chocolate-coconut base, a smooth custard center, and a thin chocolate topping that breaks gently as you bite into it. No single layer has to carry the dessert. They work together, which is exactly what makes Nanaimo Bars so memorable.
The recipe is also more forgiving than its polished appearance suggests. You can prepare it without an oven, make it ahead for an event, store extra portions in the freezer, and experiment with coffee, mint, orange, peanut butter, or dark chocolate.
Start with the classic version first. Give every layer enough time to chill, score the topping before it hardens, and use a warm knife for clean cuts. Once you see those three tidy layers on your first finished square, you will understand why this Canadian dessert has earned such a devoted following.
Try this Nanaimo Bars recipe for your next gathering, holiday tray, or quiet weekend treat. After making it, share your favorite variation in the comments and let other readers know which flavor they should try next.