

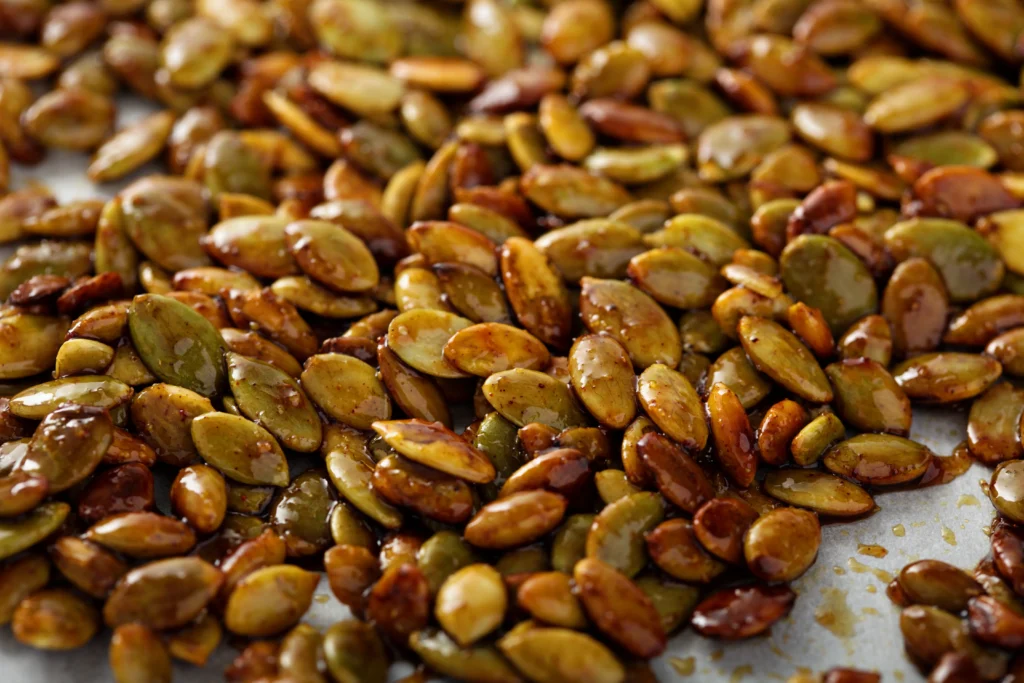
Every autumn, countless pumpkin seeds end up in the trash without a second thought. Yet those small, humble seeds can become one of the crispiest, most satisfying snacks you’ll ever make with just a handful of pantry staples.
If you’ve ever carved a pumpkin for Halloween or prepared a homemade pumpkin pie, you’ve probably wondered whether those slippery seeds were worth saving. The answer is a resounding yes. A simple Crunchy Pumpkin Seeds Recipe turns what might have been kitchen waste into a delicious snack that’s packed with flavor and nutrition.
The best part? You don’t need fancy equipment or complicated ingredients. A little olive oil, a few common seasonings, and some patience in the oven are all it takes to create perfectly roasted pumpkin seeds with an irresistible crunch.
Whether you’re looking for a healthier alternative to chips, a fun family cooking project, or a creative way to reduce food waste, this easy recipe delivers on every front. Plus, once you master the basic method, you can customize the flavors to suit any craving—from smoky barbecue and garlic parmesan to sweet cinnamon sugar.
In this guide, you’ll learn exactly how to clean, season, roast, and store pumpkin seeds so they come out crispy every single time.
Why You’ll Love This Crunchy Pumpkin Seeds Recipe
There are plenty of snack recipes online, but homemade roasted pumpkin seeds offer something unique. They’re affordable, versatile, and surprisingly nutritious.
Here are just a few reasons why this recipe deserves a permanent place in your kitchen:
- Uses pumpkin seeds you might otherwise throw away.
- Requires only a few simple ingredients.
- Naturally gluten-free and easy to make vegan.
- Packed with protein, healthy fats, and essential minerals.
- Perfect for meal prep and grab-and-go snacking.
- Easy to customize with your favorite seasonings.
Unlike many packaged snacks loaded with preservatives and artificial flavors, homemade pumpkin seeds let you control exactly what goes into every batch.
A Snack That Reduces Food Waste
Many people discard pumpkin seeds without realizing they’re completely edible. By roasting them, you’re making full use of the pumpkin while creating something genuinely delicious.
This simple habit is not only budget-friendly but also helps reduce unnecessary kitchen waste. Instead of throwing the seeds away, you transform them into a crunchy topping for salads, soups, yogurt bowls, or simply enjoy them by the handful.
Healthy Doesn’t Have to Mean Boring
One of the biggest misconceptions about healthy snacks is that they lack flavor. That’s definitely not the case here.
The combination of roasted nuttiness and simple seasonings creates a snack that’s rich, savory, and deeply satisfying. Better yet, you can switch up the flavors whenever you like:
- Classic sea salt
- Garlic and herb
- Smoked paprika
- Chili lime
- Parmesan cheese
- Cinnamon sugar
Each variation starts with the same basic roasting technique, making this one of the most versatile recipes you can add to your collection.
Ingredients for the Best Crunchy Pumpkin Seeds Recipe
The beauty of this recipe lies in its simplicity. You probably already have most of these ingredients sitting in your pantry.
Basic Ingredients
| Ingredient | Quantity | Purpose |
|---|---|---|
| Fresh pumpkin seeds | 2 cups | The star of the recipe |
| Olive oil | 1 tablespoon | Helps create a crispy texture |
| Fine sea salt | 1 teaspoon | Enhances natural flavor |
| Black pepper | ½ teaspoon | Adds mild heat |
| Garlic powder | ½ teaspoon | Gives savory depth |
| Paprika | ½ teaspoon | Adds a subtle smoky note |
Optional Flavor Boosters
| Flavor Style | Extra Ingredients |
|---|---|
| Spicy | Cayenne pepper, chili powder |
| Sweet | Brown sugar, cinnamon |
| Italian | Oregano, basil, parmesan |
| Ranch | Dill, onion powder, parsley |
| BBQ | Smoked paprika, garlic powder, brown sugar |
Ingredient Tips
Fresh seeds work best.
Seeds taken directly from a fresh pumpkin roast more evenly and develop a better crunch than older, dried-out seeds.
Don’t overdo the oil.
A light coating is all you need. Too much oil can make the seeds greasy rather than crispy.
Fine salt distributes more evenly.
Using fine sea salt instead of coarse salt helps season every bite.
How to Clean and Prepare Pumpkin Seeds
The secret to a truly crunchy pumpkin seed recipe starts long before the roasting process. Proper preparation makes all the difference.
Step 1: Remove the Seeds
Cut your pumpkin open and scoop out the seeds using a large spoon. Don’t worry if bits of orange pulp come along with them.
Place everything into a large bowl.
Step 2: Separate the Pulp
Fill the bowl with cool water and gently rub the seeds between your fingers. Most of the pumpkin flesh will naturally separate and float to the top.
Discard the pulp and drain the seeds.
Step 3: Rinse Thoroughly
Transfer the seeds to a colander and rinse under running water until they’re mostly clean.
A few tiny pieces of pumpkin attached to the seeds are perfectly fine and can even add a little extra flavor.
Step 4: Dry the Seeds Completely
Spread the seeds across a clean kitchen towel or paper towels.
Pat them dry, then allow them to air dry for at least 30 minutes if you have the time.
Pro Tip for Maximum Crunch
Moisture is the enemy of crispy pumpkin seeds.
The drier the seeds are before they enter the oven, the crunchier they’ll become after roasting.
Many home cooks skip this step and end up with chewy seeds instead of perfectly crisp ones. A little extra patience here pays off with much better results.
By the time your seeds are clean, dry, and lightly seasoned, you’re ready for the most exciting part—turning them into golden, crunchy perfection in the oven.
How to Make Crunchy Pumpkin Seeds Recipe (Step-by-Step)
Once your pumpkin seeds are clean and completely dry, it’s time to transform them into a crispy homemade snack. While the process is simple, paying attention to a few small details will make a huge difference in the final texture.
The goal isn’t just roasted seeds—it’s perfectly golden, crunchy pumpkin seeds that stay crisp long after they come out of the oven.
Step 1: Preheat Your Oven
Set your oven to 300°F (150°C).
Many people assume higher heat means faster cooking, but pumpkin seeds actually benefit from a slower roast. Lower temperatures allow moisture to evaporate gradually, creating that satisfying crunch without burning the outside.
While the oven heats, line a baking sheet with parchment paper or lightly grease it with a small amount of oil.
Step 2: Coat the Seeds Evenly
Place the dried pumpkin seeds into a large mixing bowl.
Add:
- 1 tablespoon olive oil
- 1 teaspoon sea salt
- ½ teaspoon garlic powder
- ½ teaspoon paprika
- ½ teaspoon black pepper
Mix thoroughly until every seed has a light coating.
The oil serves two purposes:
- It helps the seasonings stick.
- It encourages even browning during roasting.
Remember, less is more. Too much oil can leave the seeds soft instead of crunchy.
Step 3: Spread the Seeds in a Single Layer
Pour the seasoned seeds onto your prepared baking sheet.
Use a spatula or your hands to spread them into one even layer.
Avoid piling them on top of each other. Crowded seeds trap steam, preventing them from becoming crispy.
Think of roasting vegetables—the more space they have, the better they caramelize.
Step 4: Roast Low and Slow
Place the tray in the center of the oven.
Bake for 30 to 45 minutes, stirring every 10 minutes.
The seeds will gradually change from pale white to a beautiful golden brown.
As they roast, you’ll notice a rich, nutty aroma filling your kitchen. That’s a good sign that the natural oils inside the seeds are developing flavor.
Keep a close eye during the last 5 to 10 minutes because every oven behaves a little differently.
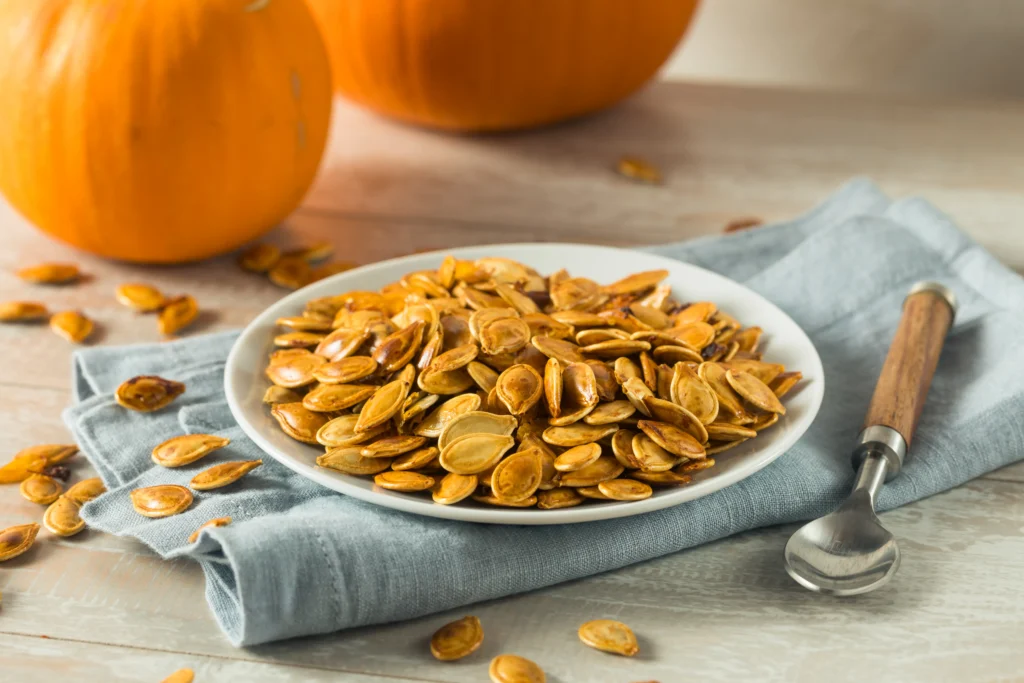
The seeds are ready when they:
- Feel dry to the touch.
- Turn lightly golden.
- Make a crisp sound when stirred.
Step 5: Let Them Cool
This is the step many people rush.
Remove the baking sheet from the oven and let the seeds cool completely.
As they cool, they continue to dry internally, becoming even crunchier.
Don’t judge the texture immediately after roasting. Give them at least 10 minutes before tasting.
Recipe Timing Overview
| Task | Time |
|---|---|
| Removing seeds | 5 minutes |
| Cleaning | 10 minutes |
| Drying | 30 minutes |
| Seasoning | 5 minutes |
| Roasting | 30–45 minutes |
| Cooling | 10 minutes |
| Total Time | About 1 hour 30 minutes |
| Recipe Information | Details |
|---|---|
| Servings | 4 |
| Difficulty | Easy |
| Calories (Approx.) | 160 per serving |
| Preparation Style | Oven Roasted |
Secrets to Extra Crunchy Pumpkin Seeds
If you’ve ever made roasted pumpkin seeds that turned out chewy instead of crisp, you’re not alone.
The difference between average and amazing usually comes down to a few simple techniques.
Dry the Seeds Thoroughly
Water is the biggest obstacle to crispiness.
Even after rinsing, moisture can remain trapped around the shells.
For the best results:
- Pat dry with a kitchen towel.
- Spread on paper towels.
- Let air dry for 30 to 60 minutes.
Some experienced home cooks even leave them uncovered overnight.
Roast at a Lower Temperature
High temperatures cook the outside too quickly while leaving moisture trapped inside.
A slow roast at 300°F creates a much better texture.
Patience pays off.
Stir During Baking
Turning the seeds every 10 minutes helps them cook evenly.
This prevents burnt spots and allows every side of the shell to crisp up.
Use Just Enough Oil
A very light coating is ideal.
Too little oil and the seasonings won’t stick.
Too much oil and the seeds become greasy.
One tablespoon for two cups of seeds is usually the sweet spot.
Let Them Cool Before Storing
Freshly roasted seeds may still contain residual steam.
Placing warm seeds into a sealed container traps moisture and softens them.
Always allow them to cool completely before transferring them to storage jars.
Common Mistakes to Avoid
Even an easy recipe has a few pitfalls. Avoid these common errors, and your pumpkin seeds will turn out beautifully every time.
Mistake #1: Skipping the Drying Process
Wet seeds steam instead of roast.
This often leads to a rubbery texture.
Mistake #2: Overcrowding the Baking Sheet
Seeds piled together release moisture into each other.
Spread them out into one thin layer.
Mistake #3: Using Too Much Seasoning
Pumpkin seeds have a naturally pleasant nutty flavor.
Overloading them with spices can overpower that taste.
Start simple—you can always add more after roasting.
Mistake #4: Roasting at High Heat
Temperatures above 350°F often burn the shells before the inside becomes crisp.
A lower temperature creates a much better result.
Mistake #5: Storing Them While Warm
Warm seeds release condensation.
That trapped moisture quickly ruins the crunch you’ve worked so hard to achieve.
The Best Seasoning Ideas for Pumpkin Seeds
One of the reasons this Crunchy Pumpkin Seeds Recipe never gets boring is that you can create countless flavor combinations.
Classic Sea Salt
Simple, clean, and timeless.
Mix:
- 1 teaspoon sea salt
- 1 tablespoon olive oil
Perfect for everyday snacking.
Garlic Parmesan
For a richer savory flavor, combine:
- Garlic powder
- Italian seasoning
- Finely grated parmesan cheese
Add the parmesan during the final few minutes of roasting.
Sweet Cinnamon Sugar
If you prefer sweet snacks, toss the roasted seeds with:
- Cinnamon
- Brown sugar
- Tiny pinch of salt
This variation pairs beautifully with coffee or hot apple cider.
Chili Lime
Looking for something bold?
Combine:
- Chili powder
- Cayenne pepper
- Lime zest
- Sea salt
The balance between spicy and tangy makes this a favorite for parties.
Smoky BBQ
Mix together:
- Smoked paprika
- Garlic powder
- Onion powder
- Brown sugar
- Black pepper
The result tastes surprisingly similar to your favorite barbecue chips—but with far better ingredients.
Flavor Comparison Guide
| Flavor | Taste | Best Occasion |
|---|---|---|
| Sea Salt | Classic & Light | Everyday snack |
| Garlic Parmesan | Rich & Savory | Family gatherings |
| Cinnamon Sugar | Sweet & Warm | Fall desserts |
| Chili Lime | Zesty & Spicy | Game day snacks |
| Smoky BBQ | Bold & Smoky | Outdoor parties |
With these seasoning combinations in your collection, you’ll never have to make the exact same batch twice.
Health Benefits of Pumpkin Seeds
A great snack should do more than satisfy your cravings. One of the biggest advantages of this Crunchy Pumpkin Seeds Recipe is that it combines incredible flavor with impressive nutritional value.
Pumpkin seeds, often called pepitas, are naturally rich in vitamins, minerals, antioxidants, and healthy fats. When roasted with simple seasonings, they become a wholesome alternative to heavily processed snack foods.
Rich in Plant-Based Protein
Protein helps your body repair tissues, maintain muscle mass, and keep you feeling full between meals.
A handful of roasted pumpkin seeds provides a surprising amount of plant-based protein, making them an excellent choice if you’re looking to reduce your reliance on processed snacks.
If you enjoy hiking, working out, or simply need an afternoon energy boost, a small container of homemade pumpkin seeds is easy to carry and satisfying to eat.
Excellent Source of Magnesium
Many people don’t get enough magnesium in their daily diets.
This essential mineral supports:
- Muscle function
- Healthy bones
- Nerve communication
- Energy production
- Heart health
Adding roasted pumpkin seeds to your weekly meal plan is a simple way to increase your magnesium intake naturally.
Packed with Healthy Fats
Not all fats are bad. Pumpkin seeds contain heart-friendly unsaturated fats that can be part of a balanced diet.
Combined with fiber and protein, these healthy fats help create a snack that leaves you feeling satisfied much longer than sugary alternatives.
Loaded with Antioxidants
Pumpkin seeds contain natural antioxidants that help protect your cells from everyday stress.
These compounds contribute to overall wellness and are one more reason why whole foods deserve a place in your kitchen.
A Good Source of Zinc and Iron
Zinc plays an important role in supporting your immune system, while iron helps your body transport oxygen efficiently.
Including nutrient-dense foods like pumpkin seeds in your diet can help support overall health while adding variety to your meals.
How to Store Roasted Pumpkin Seeds
After you’ve made the perfect batch, you’ll want to keep them fresh and crunchy.
Fortunately, proper storage is simple.
Room Temperature
Place completely cooled pumpkin seeds in an airtight container.
They will stay fresh for about one week if stored in a cool, dry place.
Glass jars with tight-fitting lids work especially well.
Refrigeration
If you want them to last longer, store them in the refrigerator.
Shelf life: up to one month.
The cool environment helps preserve their natural oils and prevents them from becoming stale.
Freezing
You can even freeze roasted pumpkin seeds.
Store them in freezer-safe containers or zip-top bags for up to three months.
Allow them to come to room temperature before serving.
Storage Tips for Maximum Freshness
- Always cool seeds completely before storing.
- Keep away from direct sunlight.
- Avoid humid environments.
- Use airtight containers.
- Do not mix warm and cool batches together.
Following these simple steps helps preserve the crunch that makes this recipe so enjoyable.
Creative Ways to Enjoy Crunchy Pumpkin Seeds
While they’re fantastic straight from the jar, roasted pumpkin seeds are surprisingly versatile.
Here are some easy ways to use them throughout the week.
Sprinkle Them on Salads
Replace traditional croutons with crunchy pumpkin seeds for extra texture and nutrition.
They pair especially well with:
- Caesar salad
- Spinach salad
- Mixed greens
- Roasted vegetable salads
Add Them to Soup
A handful of roasted seeds can transform a simple bowl of soup.
Try them on:
- Butternut squash soup
- Tomato soup
- Pumpkin soup
- Creamy vegetable soups
The contrast between creamy soup and crunchy seeds is incredibly satisfying.
Mix Them into Trail Mix
Combine roasted pumpkin seeds with:
- Almonds
- Walnuts
- Dried cranberries
- Raisins
- Dark chocolate chips
You’ll have a homemade snack that’s perfect for road trips or busy afternoons.
Top Your Breakfast Bowl
Sprinkle them over:
- Oatmeal
- Greek yogurt
- Smoothie bowls
- Granola
They add crunch without relying on processed toppings.
Serve Them on a Charcuterie Board
Roasted pumpkin seeds make an excellent addition to holiday appetizer platters.
Pair them with:
- Cheese
- Fresh fruit
- Crackers
- Nuts
- Dried fruits
Guests are often surprised by how quickly they disappear.
Frequently Asked Questions About Crunchy Pumpkin Seeds Recipe
Can you eat the shells in a Crunchy Pumpkin Seeds Recipe?
Yes. The shells become pleasantly crispy after roasting and are completely edible for most people.
Why are my Crunchy Pumpkin Seeds not crunchy?
The most common reasons are:
- The seeds weren’t dried enough.
- The oven temperature was too high.
- They were stored before cooling completely.
Drying thoroughly and roasting slowly usually solves the problem.
Should you boil pumpkin seeds before roasting?
Boiling isn’t necessary, but some people briefly boil them in salted water before baking.
This can help season the inside of the shell, although many home cooks prefer the simpler roasting method.
How long do roasted pumpkin seeds last?
Stored in an airtight container:
- Room temperature: about 1 week.
- Refrigerator: up to 1 month.
- Freezer: up to 3 months.
Can I use seeds from any pumpkin?
Absolutely.
Carving pumpkins, pie pumpkins, and many winter squash varieties all produce edible seeds that roast beautifully.
Can I make this Crunchy Pumpkin Seeds Recipe in an air fryer?
Yes.
Cook the seasoned seeds at approximately 300°F for 12 to 15 minutes, shaking the basket every few minutes for even cooking.
Are pumpkin seeds healthy for kids?
In moderation, roasted pumpkin seeds can be a nutritious snack for older children.
Their crunchy texture and mild flavor make them a fun alternative to processed snacks.
Conclusion
Sometimes the best recipes are also the simplest.
This Crunchy Pumpkin Seeds Recipe proves that a few basic ingredients and a little patience can turn something ordinary into a snack you’ll look forward to making every year.
Instead of throwing away pumpkin seeds after carving or baking, you can transform them into a crispy, flavorful treat that’s easy to customize with your favorite seasonings. Whether you prefer classic sea salt, smoky barbecue, garlic parmesan, or sweet cinnamon sugar, there’s a version for every taste.
Even better, roasted pumpkin seeds fit naturally into a balanced lifestyle. They’re easy to prepare, simple to store, and versatile enough to enjoy on their own or as a topping for countless dishes.
The next time you cut open a pumpkin, don’t let those seeds go to waste. Save them, season them, roast them, and discover why this timeless homemade snack continues to be a favorite generation after generation.
Try It Yourself!
Have you made this Crunchy Pumpkin Seeds Recipe?
Leave a comment below and share your favorite seasoning combination. Did you go with classic sea salt, spicy chili lime, or create your own unique blend?
If you enjoyed this recipe, don’t forget to bookmark it, share it with friends and family, and explore our other easy homemade snack recipes for more kitchen inspiration.
Table of Contents
Crispy, Crunchy Pumpkin Seeds Recipe
Simple 3-Ingredient Shirley Temple Recipe You’ll Love – labelrecipes.com